Part 2 :: Configuration on Azure: OpenSwan
Hello Guys,
Welcome to the part 2 of our series on establishing a VPN between Azure and AWS using Openswan and VyOS. In this post, I will be focus on azure side of things. I had to mention that even though azure is nice and easier to use, I have not gotten extensive experience with it yet so I might not be able to explain the why for certain things.I will however without too much details provide enough for you to actually follow and replicate this tutorial. That said let’s take our dive in azure.
This will be our plan of actions :
- Create a resource group
- Create a VNET (azure side of VPC)
- Create a private subnet
- Create a static IP
- Create a network security group
- Create our ubuntu instance
- install openswan
- Prepare Openswan box
- Create a box behind Openswan
Creating a resource group
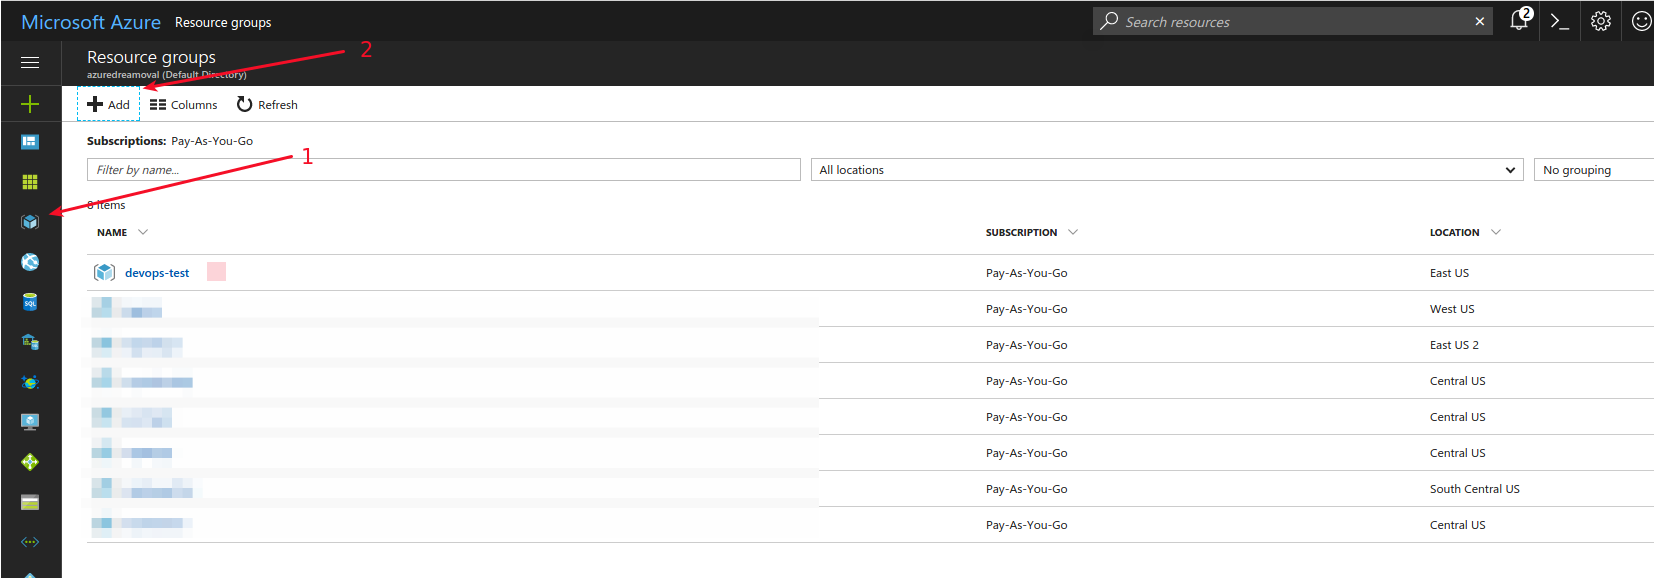
Most of items in azure are contained in a resource groups a nice way of grouping components of the same project and even give privilege to some users. In our case let’s just have a resource group for this experiment. I have called mine “devops-test”
When you log into https://portal.azure.com and click on the resource group icon like shown in the image below, you will be taking to a resource group page where you will need to click on the “+” sign to create a new resource group
Creating our network azure VNET
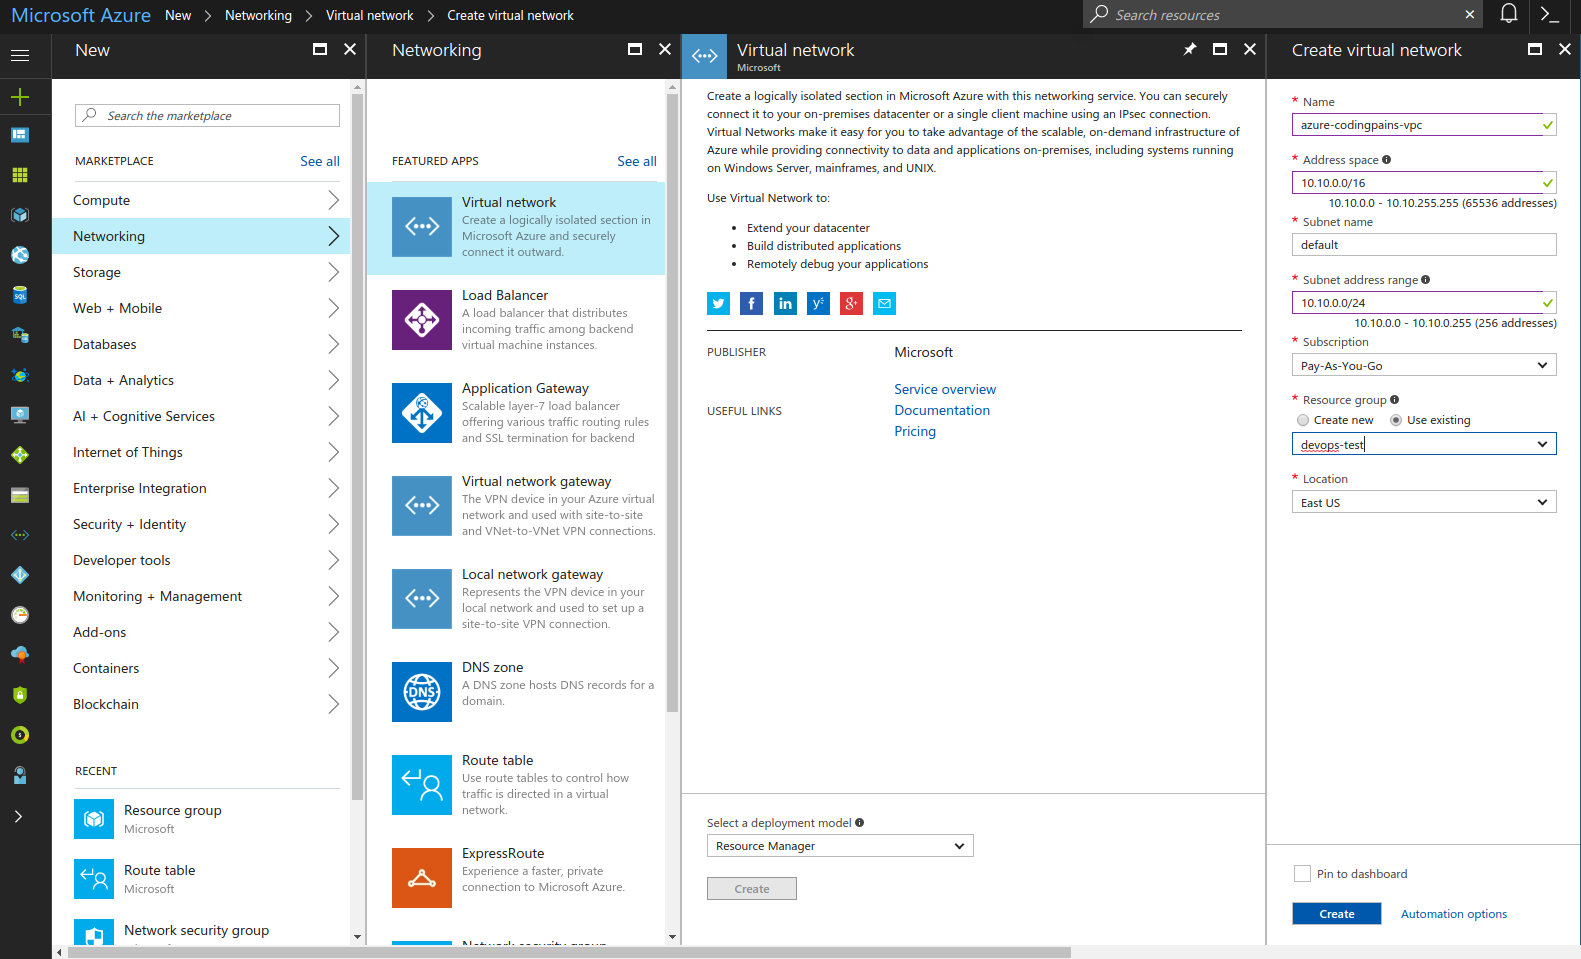
In order to have our experiment up and running on azure, we needed to have our network set up on azure as well. One good thing about this is that when this network is created, it will come with a default subnet 10.10.0.0./24 which is already public meaning that it’s reachable on internet. We therefore have less steps to have our configuration complete here on azure. To have it done click on the green “+” sign at the left column of the portal > networking > click on virtual network > choose resource manager as deployment option click on create > fill in your details.
On azure , I will be using the 10.10.0.0/16 network. See screenshot below
Creating our private subnet
This is another subnet we could be using like in AWS. But it all depends on availability on azure of something called NAT gateway or on time available to get another box behave like a NAT box. I decided to still maintain this subnet for now just for the purpose of knowing how it’s done on azure.
In order to create our subnet, we will need to locate our vnet first. In your resouce group like shown in the “Creating a resource group” section, click on your “devops-test” group, and locate your vnet. Mine is called “azure-codingpains-vpc” and when clicked, it takes me to the vnet page where I can see “Subnets” on its left panel. Click on Subnets link to open the subnet blade. On top of the blade , click on “+ subnet” button to create another subnet as shown below. I have created the 10.10.10.0/24 subnet with the name azure-codingpains-private-subnet

Creating our static IP
As explained before this is to make sure that we present the same “face” to our partners(vyos) connecting to us whether the box has been restarted or not, we need to maintain the same IP. This is specially true if the other side locks down connection to our IP, that means we won’t be able to connect if we change our IP. To create our IP let’s do a look up with the key word “public ip”. To do that click on the big green “+” sign and type “public ip” on the top search bar with that placeholder”search the marketplace”
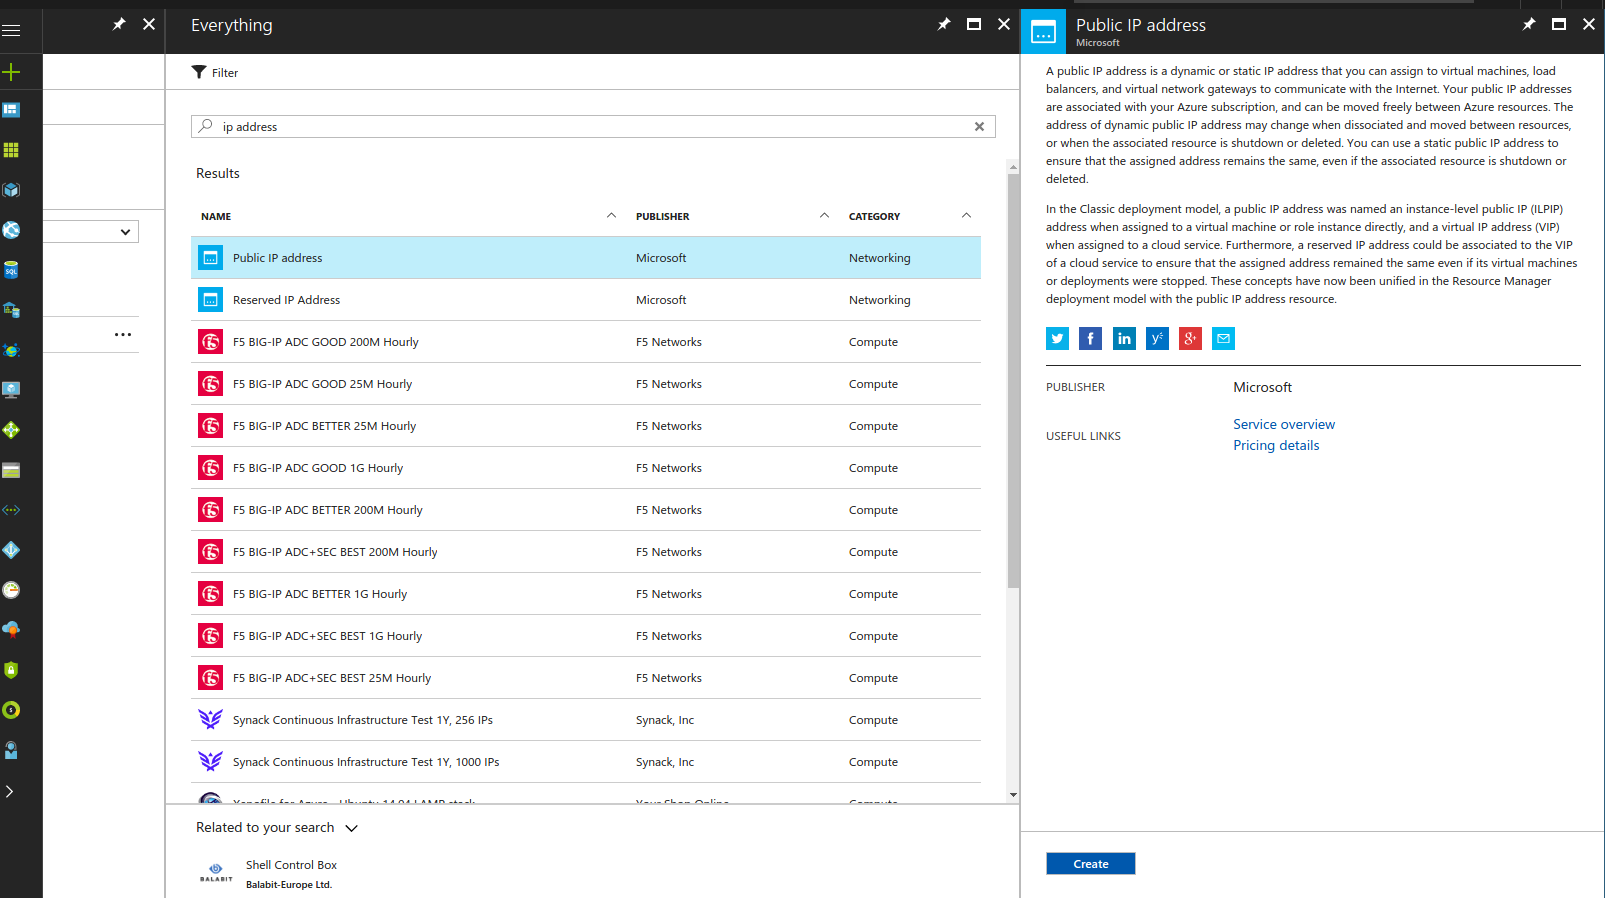
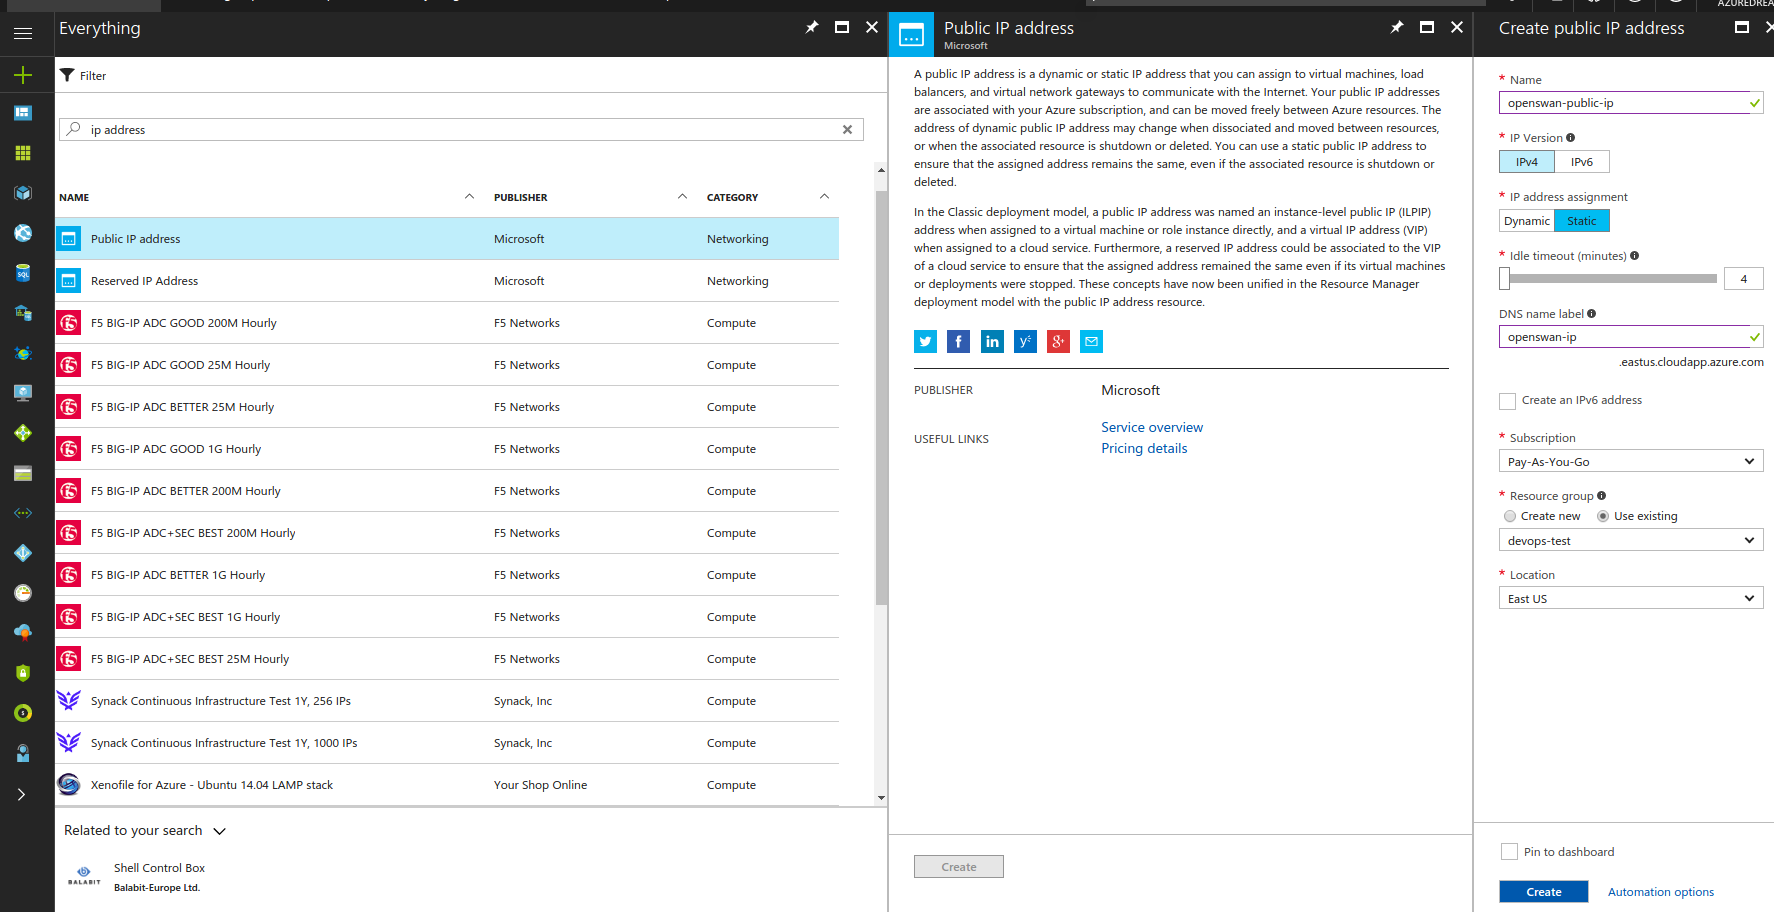
As shown above we have reserved IP and public IP address. We are supposed to take the reserved but when I used that, I got the notification that it wasn’t supported in the EAST US on my subscription so I changed that to public IP address and made sure I select the static option. I gave i the name “openswan-public-ip”.
Create a network security group
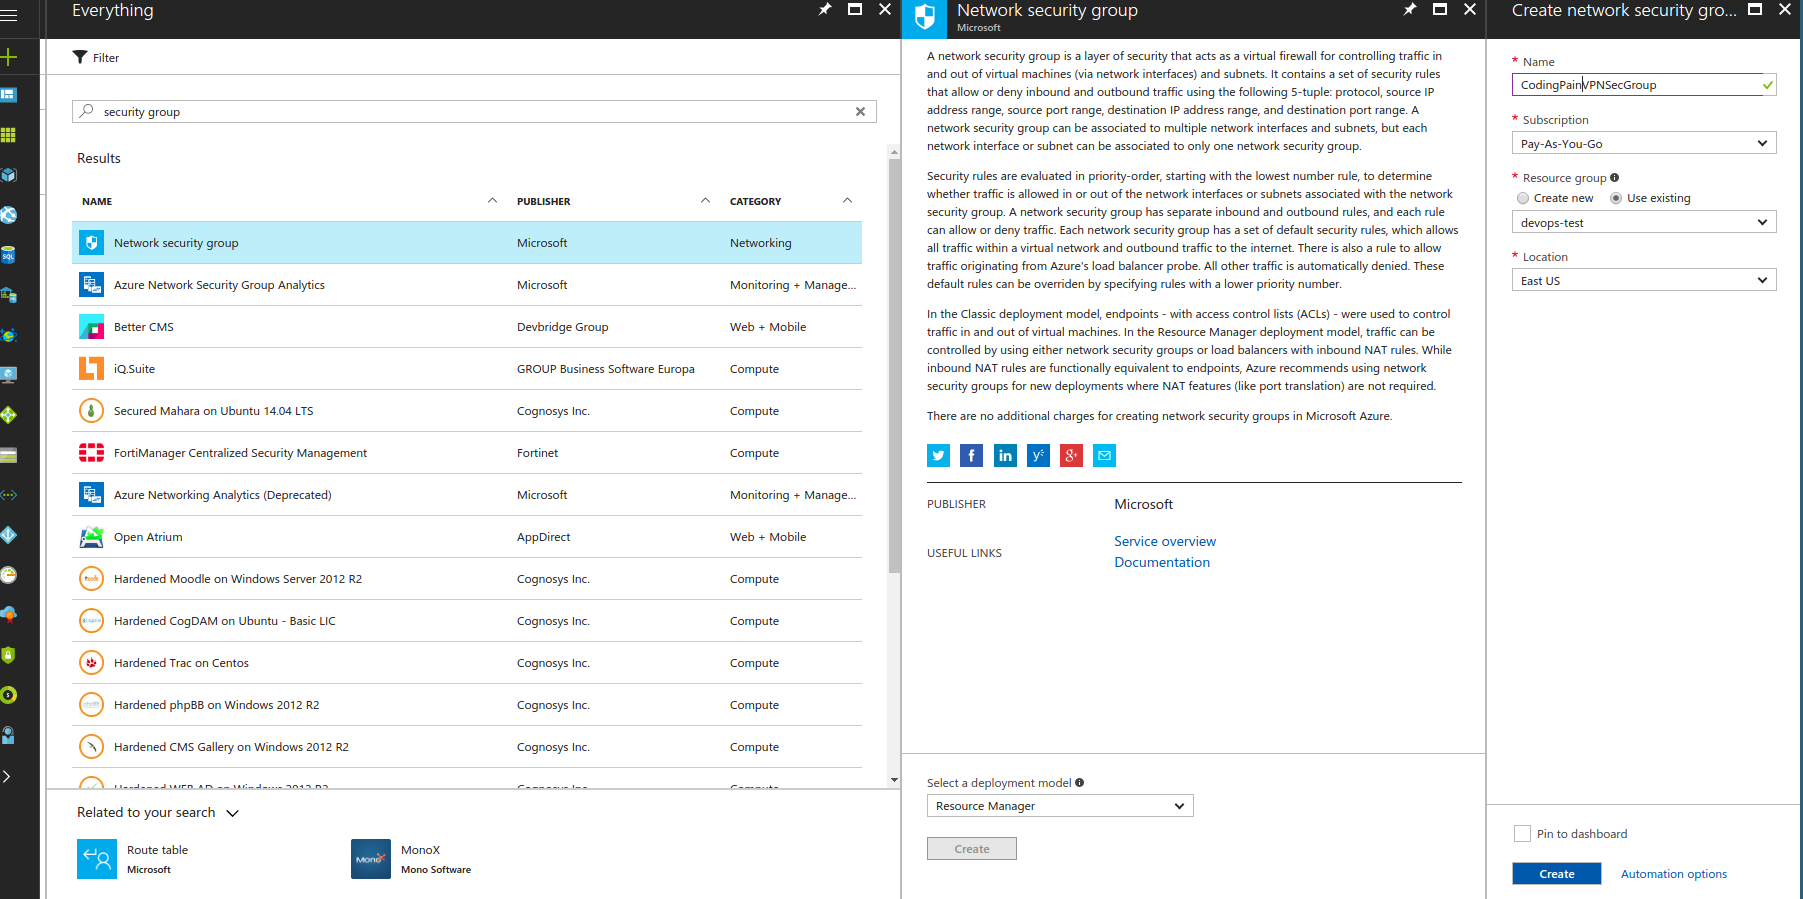
In order to allow required access to the openswan box and subsequently to other boxes we needed to have a security group. But in azure portal, security groups can only be applied to a subnet or to a NIC. I have read somewhere that it’s still possible to apply it to a VM but on the old portal called classic. That said let go create our own. As shown in the step above, search for security group in the search bar like shown below and name it. I gave it “CodingPainsVPNSecGroup” name.
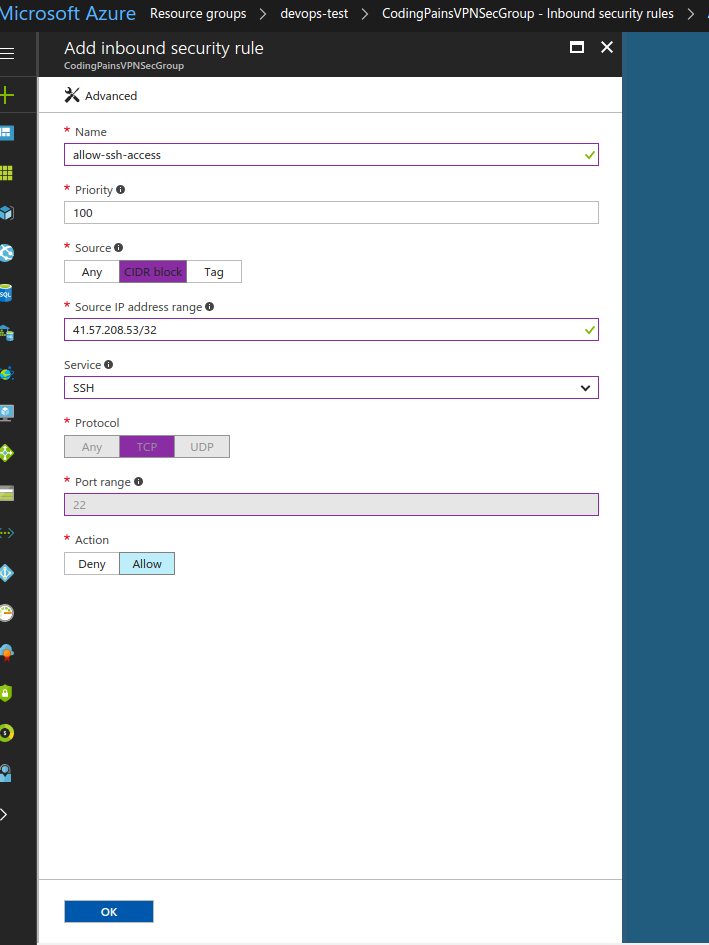
We now need to allow my IP of the time on port 22 for ssh access. Locate our CodingPainsVPNSecGroup in our devop-test resource group, click on it to open its page. On the left panel click on “inbound security rules”. Click on “+ Add” to create our first rule like shown below
Create our ubuntu instance
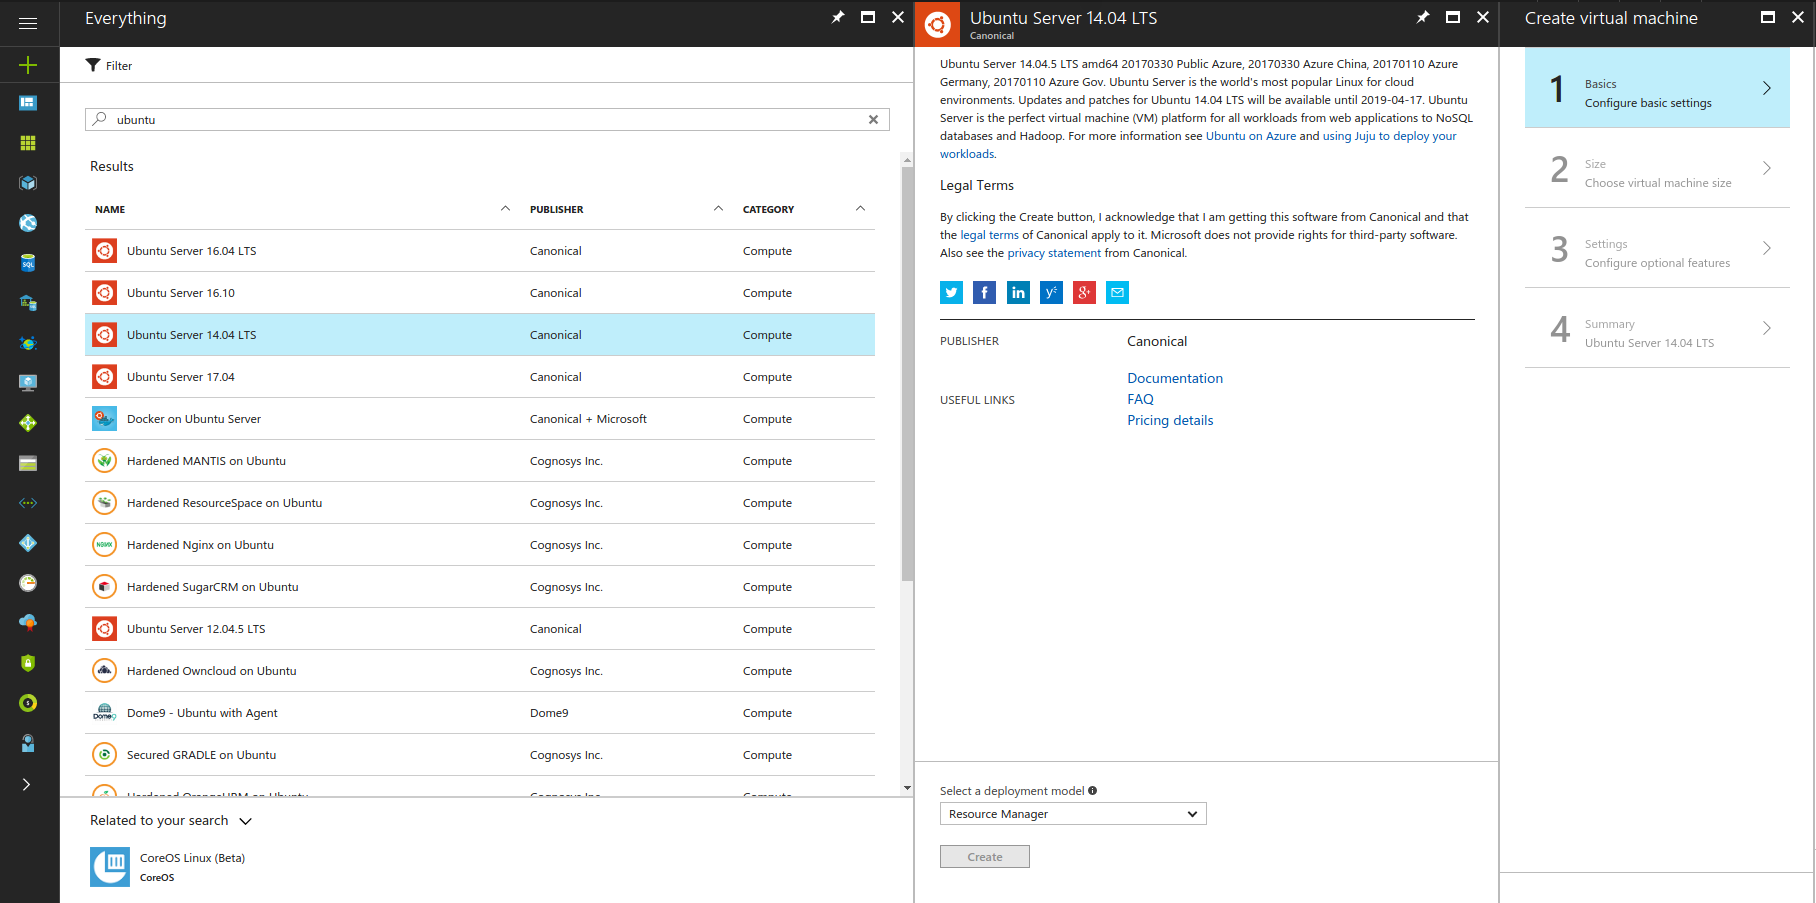
Because there could be so many different ubuntu version and other community contributed AMIs, I did a search for ubuntu in order to choose version 14.04 LTS . That’s the one we will need for our openswan installation. Openswan is not available on version 16.04 by default so if you are the type who like latest flashy stuff, don’t go monkeyfy yourself.
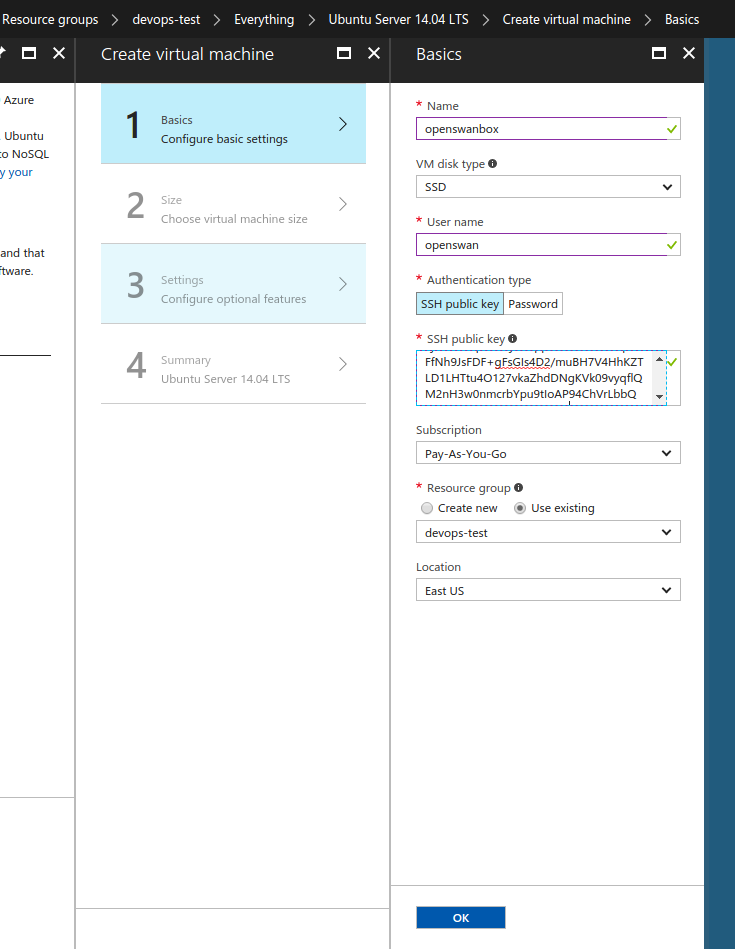
On the pic below, we key in basic settings information such as:
|
1 2 3 4 5 |
name: openswanbox vm disk type: HDD (don't choose SSD like on the image, if not you can't use cheaper instance size) public ssh key: the same public key from our pair created in part 1 resource group: same as before (devops-test for me) location: same as before |
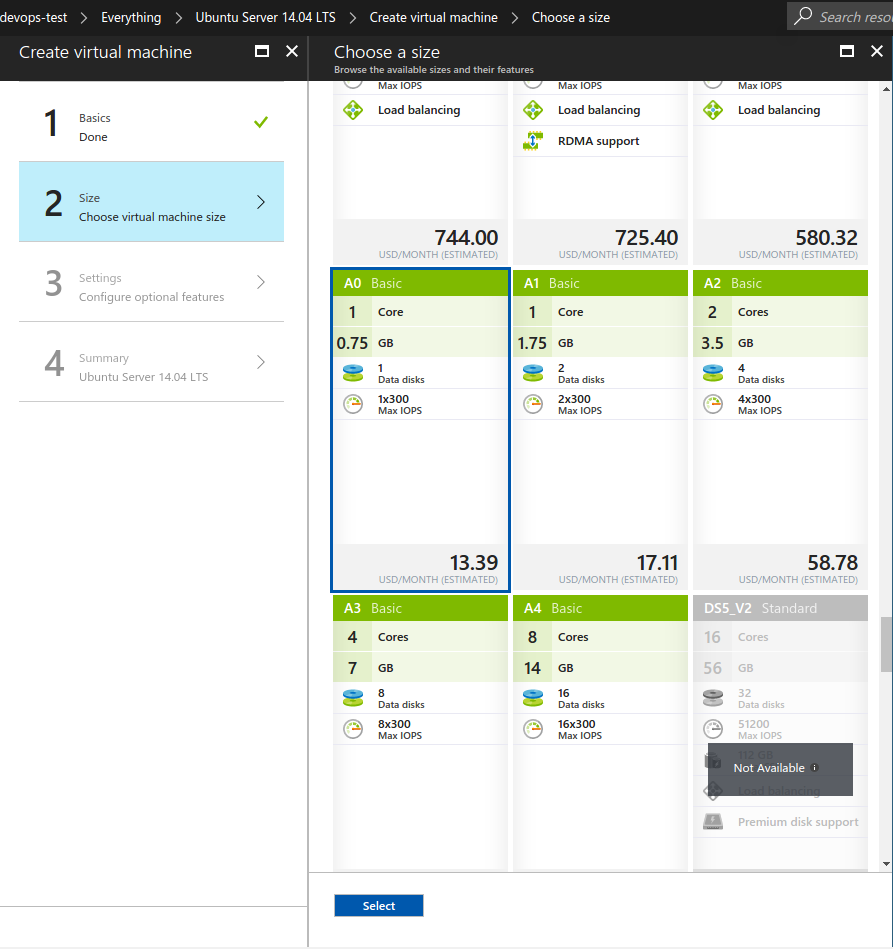
Below on the step 2 on instance creation is the size. Click to view all and pick a cheaper one like an A0 instance size type
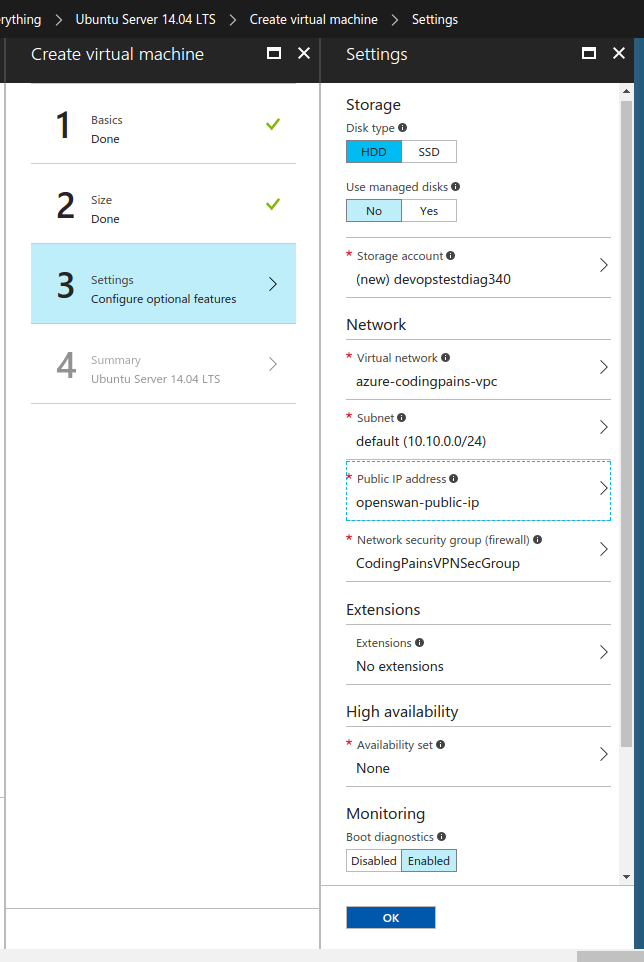
Below we map out resources we created for the instance so we choose the static IP, the security group, network etc
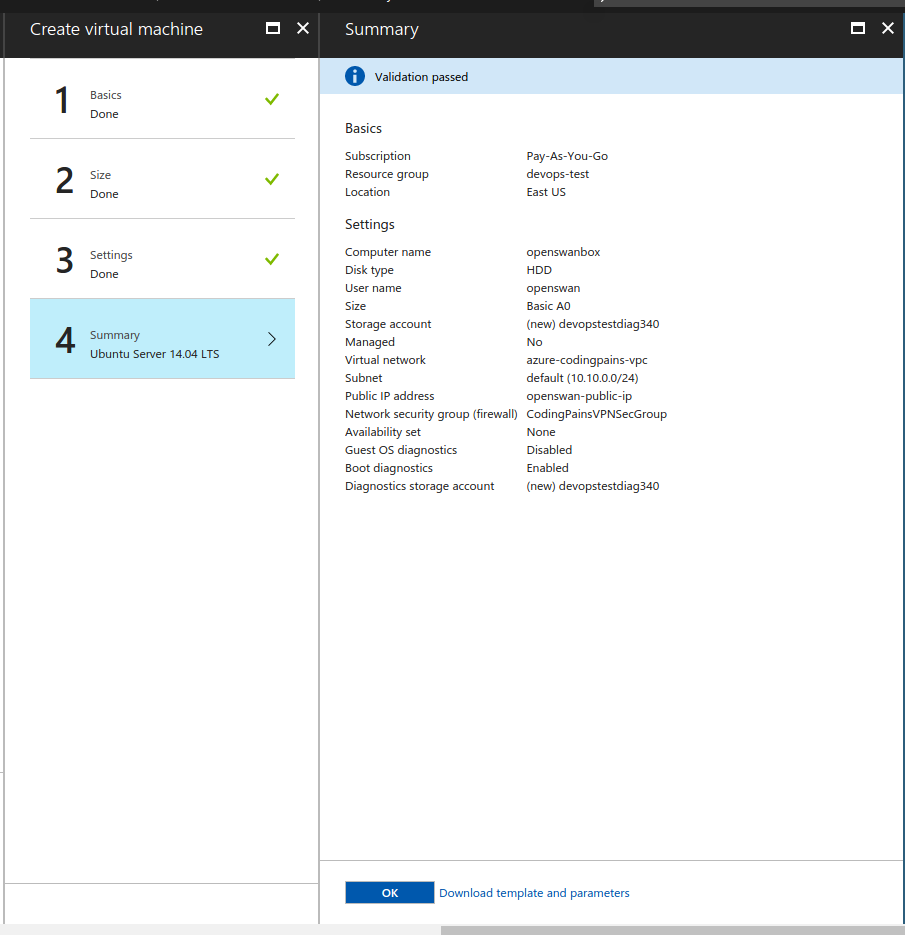
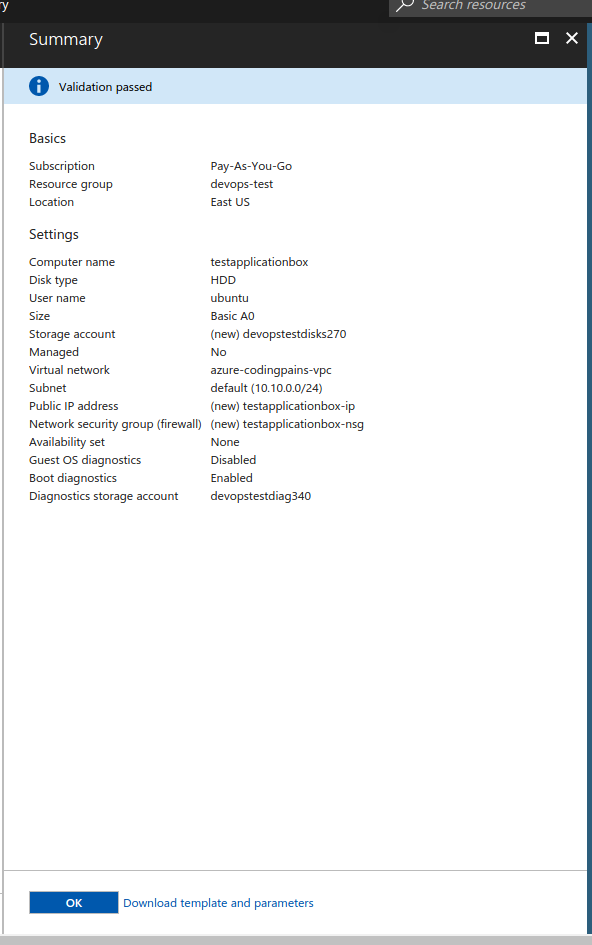
Before the instance is created on step 4 we are presented with a summary/validation page . Clicking on OK will actually create the instance
installing openswan
Let’s log into the box and start our configuration
|
1 2 3 |
~$ ssh -i condinpainsvpn.pem openswan@52.168.163.62 ~$ sudo apt-get update && sudo apt-get upgrade -y ~$ sudo apt-get install openswan rng-tools |
Preparing Openswan box
There are a number of things to enable on Openswan box for it to behave as our VPN box steps are below:
- Enable IP forwarding on azure
- Do networking tweaks as per openswan
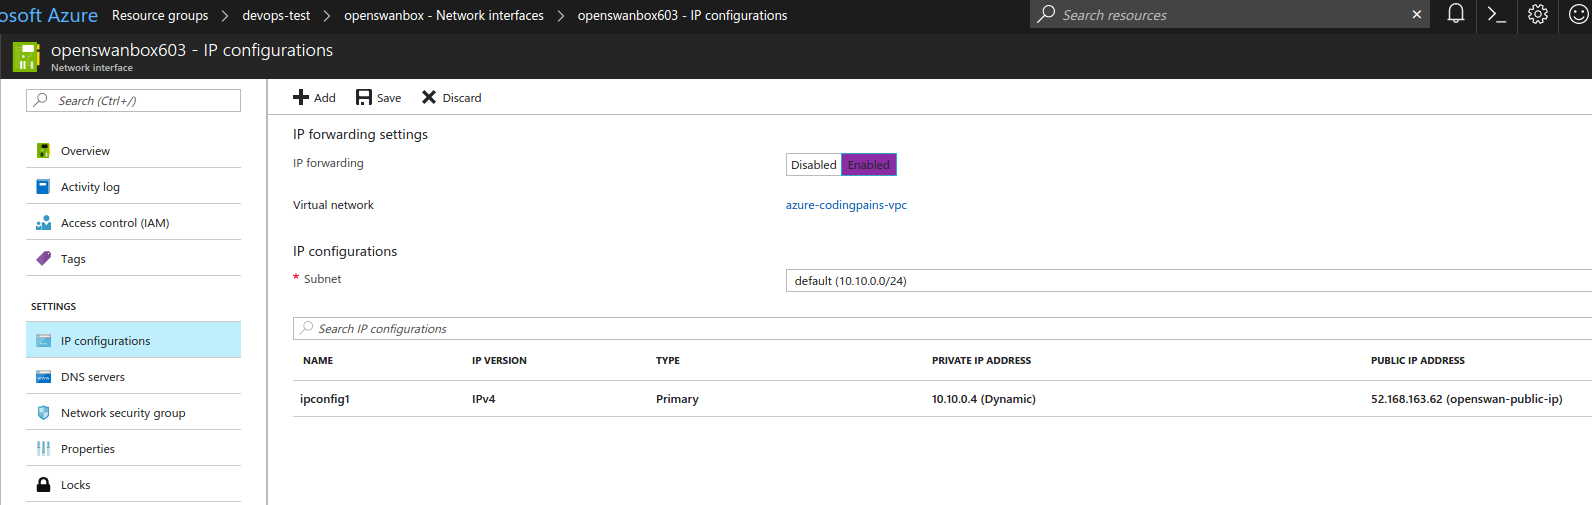
IP forwarding is a requirement for our VPN experiment and should be enabled on the VM. In order to do that you will need to get to the network interface of the openswan box and enable it. Locate and click on openswanbox in the resource group > network interface > click on its name > IP configuration > Click on Enable like shown in the picture below
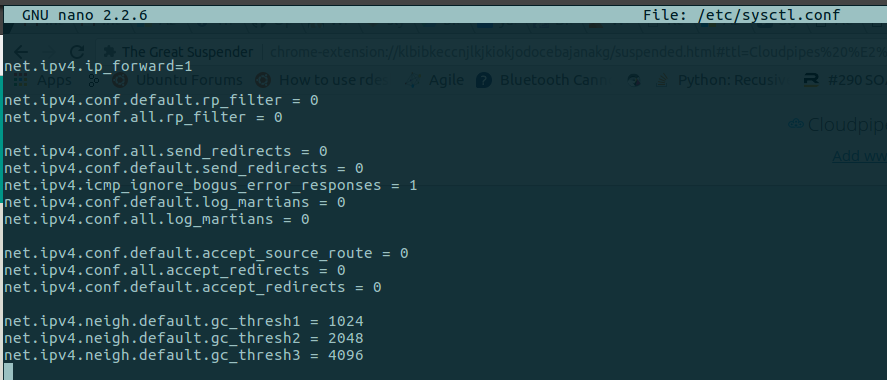
Perform networking tweaks as suggested by openswan maintainers on their git https://github.com/xelerance/Openswan/blob/master/programs/examples/sysctl.conf.in. Let’s log in
and do the following:
|
1 2 3 4 5 6 7 8 9 10 11 12 13 14 15 16 17 18 19 20 |
sudo nano /etc/sysctl.conf // and add this below at the bottom of the file net.ipv4.ip_forward=1 net.ipv4.conf.default.rp_filter = 0 net.ipv4.conf.all.rp_filter = 0 net.ipv4.conf.all.send_redirects = 0 net.ipv4.conf.default.send_redirects = 0 net.ipv4.icmp_ignore_bogus_error_responses = 1 net.ipv4.conf.default.log_martians = 0 net.ipv4.conf.all.log_martians = 0 net.ipv4.conf.default.accept_source_route = 0 net.ipv4.conf.all.accept_redirects = 0 net.ipv4.conf.default.accept_redirects = 0 net.ipv4.neigh.default.gc_thresh1 = 1024 net.ipv4.neigh.default.gc_thresh2 = 2048 net.ipv4.neigh.default.gc_thresh3 = 4096 |
Run the
sudo sysctl -p
to load the change from the /etc/sysctl.conf file.
Creating a box behind Openswan
Here we will just create a box somewhere in the default subnet so we can use it as encryption domain of our VPN. The process is quite similar to the openswan box one but this time I used ubuntu 16 and just made sure we are using the same vpc. The IP is dynamic etc. Below is a summary page of that box I refer to as application box
Below are its network interface details.
10.10.0.5
Kindly note the private IP which is important for our VPN. This one is auto assigned by Azure.

Now that we have an application box on azure side . let’s actually get an app running in there. Let’s use our faithful nginx and run it on a different port.
|
1 2 |
ubuntu@testapplicationbox:~$ sudo apt-get udpate && sudo apt-get upgrade -y ubuntu@testapplicationbox:~$ sudo apt-get install nginx -y |
Now lets configure the page nginx should server and the port to run on. Below is the file to serve
|
1 2 3 4 5 6 7 8 9 10 11 12 13 14 15 16 17 18 |
<!doctype html> <title>Azure App</title> <style> body { text-align: center; padding: 150px; } h1 { font-size: 50px; } body { font: 20px Helvetica, sans-serif; color: #333; } article { display: block; text-align: left; width: 650px; margin: 0 auto; } a { color: #dc8100; text-decoration: none; } a:hover { color: #333; text-decoration: none; } </style> <article> <h1>Azure Coding Pains!</h1> <div> <p>This means Azure App is up and working</p> <p>— The killer Team</p> </div> </article> |
Let’s configure our nginx.
|
1 2 3 4 |
//creating our document root ubuntu@testapplicationbox:~$ sudo mkdir /var/www/codingpains // paste the html file above inside the index.html ubuntu@testapplicationbox:~$ sudo nano /var/www/codingpains/index.html |
Let’s configure the default virtualhost to serve our file on port 8888. Let/s edit /etc/nginx/sites-available/default and paste the snippet below
|
1 2 3 4 5 6 7 8 9 10 11 12 |
server { listen 8888; server_name _; root /var/www/codingpains; index index.html; location / { try_files $uri $uri/ =404; } } |
Let’s reload the configuration and test
|
1 2 3 4 5 6 7 8 9 10 11 12 13 14 15 16 17 18 19 20 |
ubuntu@testapplicationbox:~$ sudo service nginx reload ubuntu@testapplicationbox:~$ curl http://localhost:8888 <!doctype html> <title>Site Maintenance</title> <style> body { text-align: center; padding: 150px; } h1 { font-size: 50px; } body { font: 20px Helvetica, sans-serif; color: #333; } article { display: block; text-align: left; width: 650px; margin: 0 auto; } a { color: #dc8100; text-decoration: none; } a:hover { color: #333; text-decoration: none; } </style> <article> <h1>Azure Coding Pains!</h1> <div> <p>This means Azure App is up and working</p> <p>— The killer Team</p> </div> </article> |
That’s it for part 2. In part 3 we will see how so actually tweak the box and prepares it for an actual VPN connection.