Using ansible for web deployment
Hello Guys,
this is a second post of the configuration management with ansible series. Second post after Introduction to ansible .
Previously we learned how to use ansible to automate the installation of wordpress and mysql database using ansible playbook. It’s time to spice things up a little bit. The purpose of this second post is to unveil further techniques and get to proper usage scenario of ansible in the hand of an Operation Engineer. It has been difficult to pick the techniques shown here since I wanted it be in continuity with what was discussed in the first article for this article to qualify as intermediate usage of ansible.
Ansible Components
Previously we worked with ansible playbook and modules. Let’s define what we will be using in this tutorial:
What extactly is this ansible Role?
For those who have played lego games this is where you can recall what you do with the bricks. We use them as building blocks for different random building that comes in our mind. We will use them here in ansible as well.
Roles are our bricks to build our infrastructure. This said, we have the choice of building our infrastructure using plain tasks just like how we did with our playbook in previous post or rather organize them as roles to increase re-usability of tasks defined in it, with little or no dependencies between them . Roles are a way to separate concerns and package them as completely self contained set of resources and have concepts to deal with various scenarios such as managing configuration files with placeholders or managing static files that are used in order to configure the target box etc. Roles are folders organized like showed below:
|
1 2 3 4 5 6 7 |
myrole --files --handlers --meta --tasks --templates --vars |
- Files:
- Handlers:
- Meta:
- Tasks:
- Templates:
- Vars:
Contains files such as web site maintenance holding page for example. If configured, files are copied from this folder to the target box
Contain tasks which are not used directly but called by other tasks. They are triggered. For example , calling an apache restart after a virtualhost is configured
Contain information about the role and its dependencies . For example a tomcat role can have java as dependency in the meta
Contains defined tasks as principal working part of the role. This is the actual workforce of the role.
Contains most of the time configuration files with placeholders to be replaced on the target servers.For example virtualhost file template for apache2
Contains variable files which are used either by templates or tasks. Variables defined here overrides ever other variables even vars defined in playbook,unless vars passed via command line to ansible-playbook. So one should be careful using this.
Setting up our inventory
Based on our mother post “Configuration Management with Ansible”, we have agreed on the following folder structure:
|
1 2 3 4 5 |
~/ansible +inventories +keys +playbooks +roles |
That done, we will need to instruct ansible about where to find inventories and roles since we have changed them from the default one. Let’s edit our ansible configuration file. In Ubuntu, that file is located at /etc/ansible/ansible.cfg
Rule of thumb is , if you really…really love yourself, you will always back up any configuration file you are about to tamper with no matter how serious or not it can affect the system. Let’s do our backup with the following commands:
|
1 |
sudo cp /etc/ansible/{ansible.cfg,ansible.cfg.bak} |
In ansible.cfg locate these 3 lines in [default] section.
|
1 2 3 |
inventory = /home/yourusername/ansible/inventories roles_path = /home/yourusername/ansible/roles host_key_checking = False |
Let’s shed some lights on this “host_key_checking” before you go on looking around on google for its meaning.
Host Key Checking is set to false to prevent you from pulling your hair when you are playing with about 40 host and had to type yes 40 times upon key exchange between your machine running ansible and the 40 nodes ansible is managing. Refer to script on using ansible.
Setting boxes
We are using vagrant and virtualbox in this tutorial so below is the used Vagrantfile. In case you are not familiar with vagrant, don’t let this distract you, you can still follow this tutorial. You can use your VMs in vitualbox, VMware for physical boxes. This means you spend time setting up your machine each time you want to start afresh. You can take a snapshot of a fresh machine if that can reduce time of setting up. Usage of vagrant is a shortcut to all that setup processes. It’s just annoying sometimes.
|
1 2 3 4 5 6 7 8 9 10 11 12 13 14 15 16 17 18 19 20 21 22 23 24 25 26 |
Vagrant.configure("2") do |config| auto_config= false config.vm.provider "virtualbox" do |v| v.gui = true end config.vm.define "app1" do |app1| app1.vm.box = "ubuntu/trusty64" app1.vm.network "private_network" , ip:"192.168.56.163", :adapter =>2 end config.vm.define "app2" do |app2| app2.vm.box = "ubuntu/trusty64" app2.vm.network "private_network" , ip:"192.168.56.164", :adapter =>2 end config.vm.define "db" do |db| db.vm.box = "ubuntu/trusty64" db.vm.network "private_network" , ip:"192.168.56.165", :adapter =>2 db.vm.provider "virtualbox" do |vb| vb.memory = "1024" end end |
A little breakdown would help those who are used to simple vagrant file. This uses 2 interfaces. One default NAT interface of virtualbox from where the nodes gets their internet connection through and a secondary HostOnly interface from where ansible would interact with the newly created vagrant boxes. HostOnly network has been discused in previous tutorial. With the mysql 5.6 there are checks during the installation process with fails if there isn’t enough memory to run it. Putting my memory at 1GB works for me.
Registering new boxes to our ansible inventory
Earlier in this post we have changed our ansible inventory file to a full folder. That way we can separate each ansible boxes based on their environment. Let’s create our test environment file. Let’s create our file at ~/ansible/inventories/test
|
1 2 3 4 5 6 7 8 9 10 11 12 |
[wordpress:children] wordpress_app wordpress_db [wordpress_app] 192.168.56.164 192.168.56.163 [wordpress_db] 192.168.56.165 |
Like shown in the vagrantfile we have assigned a tag to our boxes. Let’s verify whether ansible can actually see our mapping. In a terminal let’s check with the following command:
|
1 2 3 4 |
$ ansible wordpress --list-hosts -i ~/ansible/inventories/test 192.168.56.164 192.168.56.163 192.168.56.165 |
|
1 2 3 |
$ ansible wordpress_app --list-hosts -i ~/ansible/inventories/test 192.168.56.164 192.168.56.163 |
|
1 2 |
$ ansible wordpress_db --list-hosts -i ~/ansible/inventories/test 192.168.56.165 |
Just like in the previous post let’s do our host mapping at the machine level so we can have our virtualhost working perfectly by the time we finish. Let’s edit our /etc/hosts file to look like the following:
|
1 2 |
192.168.56.163 wordpress1.localhost 192.168.56.164 wordpress2.localhost |
Creating Roles
In order to redo tasks of previous introduction to ansible tutorial we need about 4 roles: apache, php, wordpress and mysql.
A Little Experimentation
Let’s do a little warm up here. Let’s learn how to setup our vagrant boxes to use permission file instead of username and password that we have been using up to now. For that we will need to create the Public and Private Key for ansible to use and “inform” the boxes to let ansible in when it presents its private key for authentication.
Creating public/private key
|
1 2 3 4 5 6 7 8 9 10 11 12 13 14 15 16 17 18 19 20 |
~/ansible/keys$ ssh-keygen -f ansible.pem -b 2048 -C ourveryownansible Generating public/private rsa key pair. Enter passphrase (empty for no passphrase): Enter same passphrase again: Your identification has been saved in ansible.pem. Your public key has been saved in ansible.pem.pub. The key fingerprint is: ef:d7:9e:5c:aa:fd:4d:d5:9d:da:8a:17:ae:cd:a1:80 ourveryownansible The key's randomart image is: +--[ RSA 2048]----+ | | | | | | | +| | S .+| | .. .o .| | E .. .+..o| | .. *=+=.| | .=+**.o| +-----------------+ |
When you look inside our ansible keys folder you will see ansible.pem and ansible.pem.pub , .pem being the private key and pem.pub being the public key. Note that keys are created without any passphrase.
Let’s change directory to ~/ansible/roles. In there let’s initiate the process of having roles folder structure created using ansible-galaxy
|
1 2 |
~/ansible/roles$ ansible-galaxy init user - user was created successfully |
Let’s see which files are created inside our role:
|
1 2 3 4 5 6 7 8 9 10 11 12 13 14 15 16 17 |
~/ansible/roles/user$ tree . ├── defaults │ └── main.yml ├── files ├── handlers │ └── main.yml ├── meta │ └── main.yml ├── README.md ├── tasks │ └── main.yml ├── templates └── vars └── main.yml 7 directories, 6 files |
Let’s have user/tasks/main.yml look like the following:
|
1 2 3 4 5 6 7 8 9 10 11 12 13 14 15 16 17 18 19 20 |
--- - name: Creating User user: name={{ os_user }} password={{ os_user_password }} groups=sudo append=yes shell=/bin/bash - name: Adding Authorized Key authorized_key: user={{ os_user }} key="{{ lookup('file', 'os_user_pub_key_path') }}" state=present - name: Adding Sudoers file with no password template: src=sudoer.j2 dest=/etc/sudoers.d/{{ os_user }} validate='visudo -cf %s' |
We are making use of template module in here, let’s create the user/template/suders.j2 file such as shown below:
|
1 |
{{ os_user}} ALL=(ALL) NOPASSWD:ALL |
Bootstrapping Boxes
Now that we have our mini role on the way, let’s test it with our boxes. The purpose of that role is to set an OS user on linux machine, so ansible can use that user as opposed to vagrant username that comes default with vagrant/ubuntu boxes and a permission file as opposed to password. The user role sets the user as sudoer with all privileges and without password (in case you are not sure where exactly, well it’s that one liner in the sudoer.j2 file 😀 ).
Important: I recently realized the importance of the validate option for some of the ansible file modules(in this instance template : “validate=’visudo -cf %s‘”) when dealing with configuration files especially. This validates the template of the configuration and revert in case of error. For sudoer files for example, in case of errors you will simply and purely be locked out of the box. Adios Amigo!!! kind of stuff
Running our user role
In order to run the role let’s use this small ~/ansible/playbooks/bootstraping_playbook.yml
|
1 2 3 4 5 6 7 8 9 10 11 12 13 |
--- - hosts: all roles: - user sudo: True vars_prompt: - name: "os_user" prompt: "Enter the OS User name" - name: "os_user_password" prompt: "Enter the OS User Password" - name: "os_user_pub_key_path" prompt: "Enter OS User public key path" private: no |
Running our playbook.
|
1 2 3 4 5 6 7 8 9 10 11 12 13 14 15 16 17 18 19 20 21 22 23 24 25 26 27 28 29 30 31 32 |
$ ansible-playbook -u vagrant -k -i ~/ansible/inventories/test --limit wordpress ~/ansible/playbooks/bootstraping_playbook.yml SSH password: # I used vagrant here Enter the OS User name: # I used ansible here Enter the OS User Password: # I used ansible here Enter OS User public key path: ~/ansible/ansible.pem.pub PLAY [all] ******************************************************************** GATHERING FACTS *************************************************************** ok: [192.168.56.164] ok: [192.168.56.165] ok: [192.168.56.163] TASK: [user | Creating User] ************************************************** changed: [192.168.56.163] changed: [192.168.56.164] changed: [192.168.56.165] TASK: [user | Adding Authorized Key] ****************************************** changed: [192.168.56.163] changed: [192.168.56.164] changed: [192.168.56.165] TASK: [user | Adding Sudoers file with no password] *************************** changed: [192.168.56.163] changed: [192.168.56.164] changed: [192.168.56.165] PLAY RECAP ******************************************************************** 192.168.56.163 : ok=4 changed=3 unreachable=0 failed=0 192.168.56.164 : ok=4 changed=3 unreachable=0 failed=0 192.168.56.165 : ok=4 changed=3 unreachable=0 failed=0 |
We have just used a playbook to execute a role a opposed to tasks. This means we can apply this role to all our boxes to get them to allow ansible user etc.This role can be further tweaked to do other things like permissions using command alias features of sudoers file etc. There are couple of things to briefly talk about here:
The use of “–limit wordpress” is due to the fact that in our playbook we have all hosts “– hosts: all” . If we had only “– hosts: wordpress” we would not need to use the limit switch but again every time we will need to run the script we will have to edit it and put the host in question to it which is to me not practical. So I wanted to show the usage of this limit stuff in case you need to know these kind of features.
Apache Role
Now that we have a taste of what using a role mean let’s use ansible-galaxy again to create our apache role. For this tutorial we will need only 3 files in apache role task folder (tasks/main.yml, tasks/http_vhost.yml handlers/main.yml) but there could be more for specific scenarios, for example for the one I use for work. Putting the content of the files here will make the post very verbose. so please refer to apache role here : https://github.com/kdjomeda/mycodingpains-ansible/tree/master/roles/apache
Php Role
Using again ansible-galaxy command we created a php role. Our php role is designed such a way that it will take care of mod_php need as well as php_fpm. In our tutorial we will use apache2 and php in mod_php fashion. the role is made up with tasks/main.yml,tasks/regular_php.yml and tasks/php_fpm.yml. Both regular and fpm files take care of what pertains to them. Please refer to php role here: https://github.com/kdjomeda/mycodingpains-ansible/tree/master/roles/php
mysqlfamily role
The name of this role suggest that it handles a number of mysql flavors. These flavors are mysql from oracle , mysql from percona called percona-server-server and mysql from mariadb foundation called mariadb. This role is a bit complex in a way and will take a whole tutorial to explain its concepts. But to explain briefly how we used it here is that each flavor of mysql has it own task file and the main task file, based on parameters used will include a particular flavor file for the installation process. Since all flavors make sure all mysql command and functions are fully compatible with original mysql from oracle(sun microsystem previously), we have a common task file which takes care of all common ground businesses of mysql in general. This role is a simple one and does not configure master-slave architecture etc. Please refer to mysqlfamily role here https://github.com/kdjomeda/mycodingpains-ansible/tree/master/roles/mysqlfamily
wordpress role
This role is also a simple one that fetched wordpress from a specified url and unpackages it to specified path. It does assume wordpress package is for a fresh installation for now and doens’t have any concept of altering wordpress configs from an preconfigured package. An example of that is when you finish work for a customer or for work on your local machine and want to send it to stage environment making sure all environment parameters are catered for. That is a preconfigured wordpress. I will improve this in subsequent commits to take that into account. Please refer to wordpress role here : https://github.com/kdjomeda/mycodingpains-ansible/tree/master/roles/wordpress
Writing our playbook
Now that we are done with our building blocks we can focus on how to run the playbook. It’s just like the previous playbook we have written in the first part of the article, the only difference is that we won’t put tasks in there directly but instruct ansible on how our roles with various parameters should be used. In our playbooks folder let’s create a playbook called : wordpress_with_rolesblocks_playbook.yml. Below is how it cooks like
|
1 2 3 4 5 6 7 8 9 10 11 12 13 14 15 16 17 18 19 20 21 22 23 24 25 26 27 28 29 30 31 32 33 34 35 36 37 38 39 40 41 42 |
--- - hosts: wordpress_app roles: - php - apache - wordpress sudo: true vars: webserver_apache_document_vhost_enable: true # webserver_apache_document_vhost_domain: wordpress1.localhost # webserver_apache_activate_vhost_list: # - wordpress1.localhost php_install_packages_list: - php5 - libapache2-mod-php5 - php5-cli - php5-mysql - php5-curl - php5-gd - php5-mcrypt wordpress_utilities_list: - unzip - tar wordpress_package_url: https://wordpress.org/latest.zip wordpress_package_destination_path: /var/www/html/vhosts/{{ webserver_apache_document_vhost_domain }}/htdocs wordpress_package_destination_path_checker: /var/www/html/vhosts/{{ webserver_apache_document_vhost_domain }}/htdocs/index.php wordpress_package_name_with_extension: wordpress.zip wordpress_unpackage_normal: true wordpress_unpackage_zip: true - hosts: wordpress_db roles: - mysqlfamily sudo: true vars: mysqlfamily_oracle_server_enable: true mysqlfamily_oracle_client_enable: true mysql_root_password: letmein mysqlfamily_database_users_list: - { user: "wp_user", db: "wp_db", host: "localhost", password: "wppassword", priv: "wp_db.*:ALL" } - { user: "wp_user", db: "wp_db", host: "192.168.56.163", password: "wppassword", priv: "wp_db.*:ALL" } - { user: "wp_user", db: "wp_db", host: "192.168.56.164", password: "wppassword", priv: "wp_db.*:ALL" } |
For some reasons , you might wonder why the following part is commented out:
|
1 2 3 |
# webserver_apache_document_vhost_domain: wordpress1.localhost # webserver_apache_activate_vhost_list: # - wordpress1.localhost |
That’s because remember we have 2 vagrant boxes using the same databases. If the parameter webserver_apache_document_vhost_domain is put on the playbook whiles we have 2 boxes which of the boxes will have the value wordpress1.localhost? Worst both of them will have that but in our local hosts routing doesn’t behave like amazon route53 or dyn or dynanot where you can at least hope for a round robin algorithm if you map 192.168.56.163 and 192.168.56.163 to wordpress1.localhost.
This is an idea scenario to introduce what’s called host_vars. In our example here we used what’s called Inventory Host_Vars. In this case since we can’t put anything about addressing and domain stuff about boxes in playbook we will put it in our inventory file. Let’s edit our ~/ansible/inventories/test in order to make it look similar to the following:
|
1 2 3 4 5 6 7 8 9 10 11 |
[wordpress:children] wordpress_app wordpress_db [wordpress_app] 192.168.56.164 webserver_apache_document_vhost_domain="wordpress2.localhost" webserver_apache_virtualhost_enable_list='["wordpress2.localhost"]' 192.168.56.163 webserver_apache_document_vhost_domain="wordpress1.localhost" webserver_apache_virtualhost_enable_list='["wordpress1.localhost"]' [wordpress_db] 192.168.56.165 |
As you can see now , the responsibility of which one gets what lies with the inventory file so it safe to take box specific mapping from playbook to inventory host_vars. There are other similar var mapping techniques that would be introduced in next tutorials which are called group_vars etc.
Before we run our playbook, let’s make sure that our ansible.pem that we created is part of our identity on the machine we are running ansible from. Let’s do the following to make sure of that:
|
1 2 |
ssh-add ~/ansible/ansible.pem Identity added: /home/<yourusername>/ansible/ansible.pem (/home/<yourusername>/ansible/ansible.pem) |
Running our Playbook
To run our playbook, it’s like previously just that this time we won’t use vagrant username because we have created ansible user on the boxes, and we won’t prompt for password either because we are using permission file and we have added it to our identity on our box so there is no need to include the .pem file with the –private-key switch. The follow command is how we run the playbook this time : ansible-playbook -u ansible -i ~/ansible/inventories/test ~/ansible/playbooks/wordpress_with_apacherole_playbook.yml
|
1 2 3 4 5 6 7 8 9 10 11 12 13 14 15 16 17 18 19 20 21 22 23 24 25 26 27 28 29 30 31 32 33 34 35 36 37 38 39 40 41 42 43 44 45 46 47 48 49 50 51 52 53 54 55 56 57 58 59 60 61 62 63 64 65 66 67 68 69 70 71 72 73 74 75 76 77 78 79 80 81 82 83 84 85 86 87 88 89 90 91 92 93 94 95 96 97 98 99 100 101 102 103 104 105 106 107 108 109 110 111 112 113 114 115 116 117 118 119 120 121 122 123 124 125 126 127 128 129 130 131 132 133 134 135 136 137 138 139 140 141 142 143 144 145 146 147 148 149 150 151 152 153 154 155 156 157 158 159 160 161 162 163 164 165 |
$ ansible-playbook -u ansible -i ~/ansible/inventories/test ~/ansible/playbooks/wordpress_with_apacherole_playbook.yml PLAY [wordpress_app] ********************************************************** GATHERING FACTS *************************************************************** ok: [192.168.56.164] ok: [192.168.56.163] TASK: [php 1="Installing" 2="php" language="|"][/php] ************************************************** changed: [192.168.56.163] changed: [192.168.56.164] TASK: [php 1="Installing" 2="php-fpm" 3="package" language="|"][/php] ************************************** skipping: [192.168.56.164] skipping: [192.168.56.163] TASK: [php 1="Fixing" 2="CGI" 3="path" 4="Info" language="|"][/php] ******************************************** skipping: [192.168.56.164] skipping: [192.168.56.163] TASK: [php 1="Installing" 2="List" 3="of" 4="Php" 5="packages" language="|"][/php] ********************************* changed: [192.168.56.164] => (item=php5,libapache2-mod-php5,php5-cli,php5-mysql,php5-curl,php5-gd,php5-mcrypt) changed: [192.168.56.163] => (item=php5,libapache2-mod-php5,php5-cli,php5-mysql,php5-curl,php5-gd,php5-mcrypt) TASK: [php 1="Uninstalling" 2="List" 3="of" 4="Php" 5="packages" language="|"][/php] ******************************* skipping: [192.168.56.163] skipping: [192.168.56.164] TASK: [apache | Install Apache2] ********************************************** ok: [192.168.56.164] ok: [192.168.56.163] TASK: [apache | Hide content of default host file] **************************** changed: [192.168.56.164] changed: [192.168.56.163] TASK: [apache | Enable Apache Mods] ******************************************* skipping: [192.168.56.164] skipping: [192.168.56.163] TASK: [apache | Disabled Apache Mods] ***************************************** skipping: [192.168.56.164] skipping: [192.168.56.163] TASK: [apache | Creating Document virtualhost files] ************************** changed: [192.168.56.164] changed: [192.168.56.163] TASK: [apache | Creating VirtualHost DocumentRoot] **************************** changed: [192.168.56.163] changed: [192.168.56.164] TASK: [apache | Enabling Virtualhosts] **************************************** changed: [192.168.56.164] => (item=wordpress2.localhost) changed: [192.168.56.163] => (item=wordpress1.localhost) TASK: [apache | Desabling Virtualhosts] *************************************** skipping: [192.168.56.164] skipping: [192.168.56.163] TASK: [apache | Restart Apache] *********************************************** changed: [192.168.56.164] changed: [192.168.56.163] TASK: [wordpress | Installing utility packages] ******************************* changed: [192.168.56.164] => (item=unzip,tar) changed: [192.168.56.163] => (item=unzip,tar) TASK: [wordpress | Getting wordpress package to install] ********************** changed: [192.168.56.163] changed: [192.168.56.164] TASK: [wordpress | Unarchive wordpress package] ******************************* changed: [192.168.56.164] changed: [192.168.56.163] TASK: [wordpress | Checking if worpress folder exists] ************************ ok: [192.168.56.163] ok: [192.168.56.164] TASK: [wordpress | Moving Files from worpress folder] ************************* changed: [192.168.56.164] changed: [192.168.56.163] TASK: [wordpress | Cleaning Document Root] ************************************ changed: [192.168.56.164] changed: [192.168.56.163] PLAY [wordpress_db] *********************************************************** GATHERING FACTS *************************************************************** ok: [192.168.56.165] TASK: [mysqlfamily | Installing Oracle Mysql Server] ************************** changed: [192.168.56.165] TASK: [mysqlfamily | Installing Oracle Mysql Client] ************************** ok: [192.168.56.165] TASK: [mysqlfamily | Installing Python Mysqldb modules] *********************** changed: [192.168.56.165] TASK: [mysqlfamily | Uploading default Configuration File] ******************** changed: [192.168.56.165] TASK: [mysqlfamily | Restarting Mysql Server] ********************************* changed: [192.168.56.165] TASK: [mysqlfamily | Delete anonymous mysql user testing mysql authentication] *** ok: [192.168.56.165] TASK: [mysqlfamily | Installing Mysql Root user] ****************************** changed: [192.168.56.165] => (item=vagrant-ubuntu-trusty-64) changed: [192.168.56.165] => (item=127.0.0.1) changed: [192.168.56.165] => (item=::1) changed: [192.168.56.165] => (item=localhost) TASK: [mysqlfamily | remove anonymous access] ********************************* ok: [192.168.56.165] => (item=vagrant-ubuntu-trusty-64) ok: [192.168.56.165] => (item=127.0.0.1) ok: [192.168.56.165] => (item=::1) ok: [192.168.56.165] => (item=localhost) ok: [192.168.56.165] => (item=%) TASK: [mysqlfamily | Remove test database] ************************************ ok: [192.168.56.165] TASK: [mysqlfamily | Creating Databases] ************************************** changed: [192.168.56.165] => (item={'host': 'localhost', 'password': 'wppassword', 'db': 'wp_db', 'user': 'wp_user', 'priv': 'wp_db.*:ALL'}) ok: [192.168.56.165] => (item={'host': '192.168.56.163', 'password': 'wppassword', 'db': 'wp_db', 'user': 'wp_user', 'priv': 'wp_db.*:ALL'}) ok: [192.168.56.165] => (item={'host': '192.168.56.164', 'password': 'wppassword', 'db': 'wp_db', 'user': 'wp_user', 'priv': 'wp_db.*:ALL'}) TASK: [mysqlfamily | Creating Users for Applications] ************************* changed: [192.168.56.165] => (item={'host': 'localhost', 'password': 'wppassword', 'db': 'wp_db', 'user': 'wp_user', 'priv': 'wp_db.*:ALL'}) changed: [192.168.56.165] => (item={'host': '192.168.56.163', 'password': 'wppassword', 'db': 'wp_db', 'user': 'wp_user', 'priv': 'wp_db.*:ALL'}) changed: [192.168.56.165] => (item={'host': '192.168.56.164', 'password': 'wppassword', 'db': 'wp_db', 'user': 'wp_user', 'priv': 'wp_db.*:ALL'}) TASK: [mysqlfamily | Setting up percona server apt-key] *********************** skipping: [192.168.56.165] TASK: [mysqlfamily | Setting up percona Repository] *************************** skipping: [192.168.56.165] TASK: [mysqlfamily | Installing Percona Server] ******************************* skipping: [192.168.56.165] TASK: [mysqlfamily | Installing Percona Client] ******************************* skipping: [192.168.56.165] TASK: [mysqlfamily | Adding GPG Keys for mariadb] ***************************** skipping: [192.168.56.165] TASK: [mysqlfamily | Adding Source file for mariab db] ************************ skipping: [192.168.56.165] TASK: [mysqlfamily | Installing Mariabdb Server] ****************************** skipping: [192.168.56.165] TASK: [mysqlfamily | Installing Mariabdb Client] ****************************** skipping: [192.168.56.165] PLAY RECAP ******************************************************************** 192.168.56.163 : ok=18 changed=12 unreachable=0 failed=0 192.168.56.164 : ok=18 changed=12 unreachable=0 failed=0 192.168.56.165 : ok=12 changed=7 unreachable=0 failed=0 |
Verification
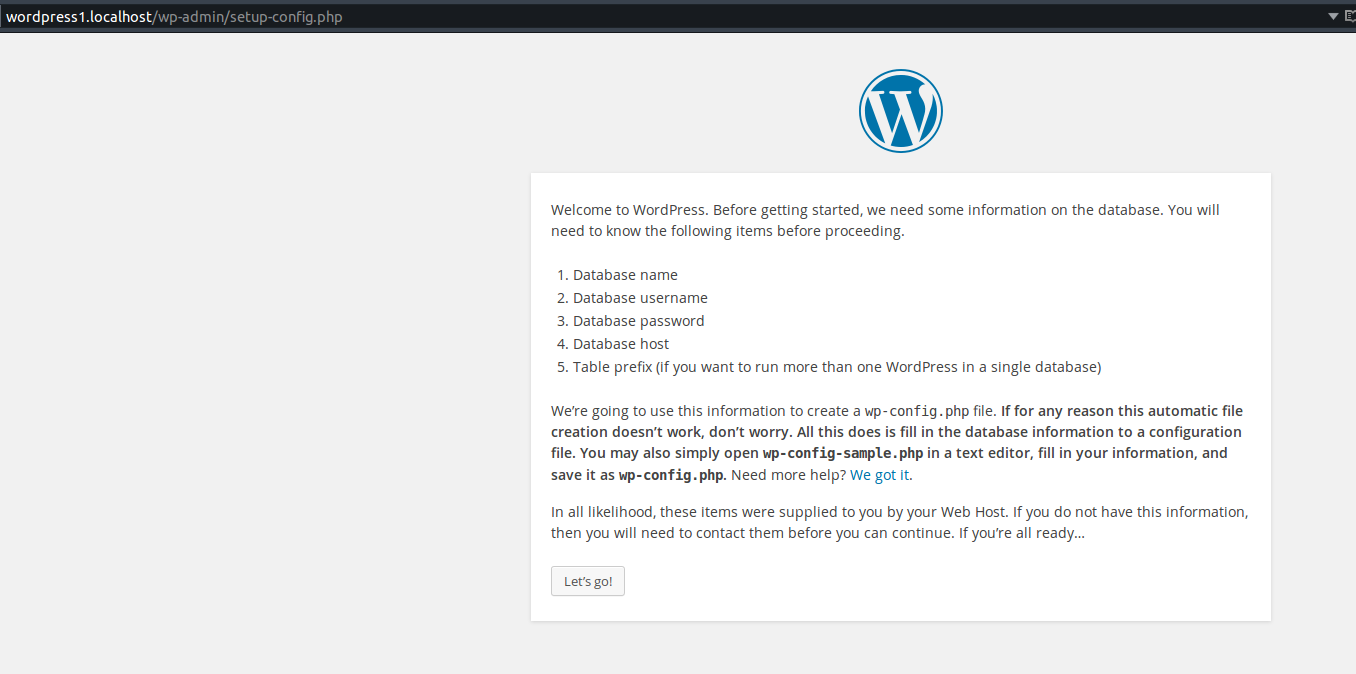
The verification phase is crucial because it’s a part where we check if ansible has done whatever it’s supposed to do. It’s also a phase where it’s possible to note down things to tweak further etc. In this case , our expectation is that when we get to wordpress1.localhost and wordpress2.localhost we get a wordpress screen that starts the installation wizard. Like shown below:

Takeaway notes
- So how has this (roles stuff) been beneficial? : This is beneficial because next time I need to install apache or mysql, instead of writing the tasks of adding percona or mysql or apt module stuff of any of the packages used here like done in the first part of this series, we will only need to specify the role needed in our new playbook and we are done. This shortens time needed to complete a particular job on this packages, it makes the DevOps guys efficient and this is value of any company.
- Most of my roles here are geared towards this tutorial but note that it emphasis on installation etc but not on removal or undoing of something, this is just to say, roles are not just for installation stuff but also about their removal or dismissal etc.So when building your own, make sure it caters for all aspect of the lifecycle of your package
- Finally if you notice passwords are in plain text and open for anybody who has access to the repository this files are checked in (git or svn). So it’s not a good practice.In the next post we will add more advance stuff like ansible-vault to take care of the sensitive information of your infrastructure.
Nice Article. How it help to developer in terms of balance the day to day life.
Thanks for the remark. There are so much I wish to write about but it takes time.