Hello Folks
I must admit, I have been very reluctant in using vagrant for while before I have seen the light. I actually had my wow moment when I managed to set up a complex virtual IT infrastructure to simulate a deployment architecture with just few lines.
Let’s get going with our task today. For those still unsure of what vagrant is , please here to their why-vagrant page .
Prerequisite
This tutorial greatly assumes that you have Virtualbox installed and that you are familiar with it’s usage. If not you can head to their online manual or better still this simplistic tutorial to have a fair idea on what it does or can do.
Installing Vagrant
On the vagrant download page , download your OS specific package for your architecture and install it. Since I use an ubuntu desktop machine I have used the following command to install:
[bash]
$ sudo dpkg -i /path/to/download/folder/vagrant_1.7.2_x86_64.deb
$ vagrant –version ##to verify the installation. The outputs should be : Vagrant 1.7.2
[/bash]
Loading Vagrant with Images
Once we have our vagrant nicely installed and everything we will need to load it with couple of OS images that we plan to use. So let’s stop here an break things down a little. So for our normal usage of VirtualBox(this is valable for VMWare as well ), in order to virtualize an OS, I will most of the time need to have the image of that OS , the version and the architecture etc. In the same vein to have vagrant manage the creation of our virtualization for us, we need to use specific vagrant compatible images. These are called base boxes
One cool thing about vagrant is that there are providers of those images like atlas hashicorp or vagrantbox.es . I actually prefer the former.
Let’s add an ubuntu precise and trusty 64 bits images (base boxes) to our vagrant with the command below
[bash]
$ vagrant box add ubuntu/precise64
==> box: Loading metadata for box ‘ubuntu/precise64’
box: URL: https://atlas.hashicorp.com/ubuntu/precise64
==> box: Adding box ‘ubuntu/precise64’ (v20150619.0.0) for provider: virtualbox
box: Downloading: https://atlas.hashicorp.com/ubuntu/boxes/precise64/versions/20150619.0.0/providers/virtualbox.box
==> box: Successfully added box ‘ubuntu/precise64’ (v20150619.0.0) for ‘virtualbox’!
$ vagrant box add ubuntu/trusty64
#…
[/bash]
One both boxes are added to our vagrant installation we are ready to start. On thing you might want to check is the list of images that you have. The command below shows all vagrant virtualbox compatible boxes
[bash]
$ vagrant box list
chef/centos-6.5 (virtualbox, 1.0.0)
hashicorp/precise64 (virtualbox, 1.1.0)
ubuntu/precise64 (virtualbox, 20150619.0.0)
ubuntu/trusty64 (virtualbox, 14.04)
yungsang/coreos (virtualbox, 1.3.8)
[/bash]
Of course I have added a couple of other base boxes to my vagrant so my list will be slightly different from yours.
Starting a Virtual Machine with vagrant
Now that we have everything needed let’s start a vagrant project. A vagrant project is actually made up with a folder (for identification or grouping sake) and a Vagrantfile. In order to describe the way you want your virtual machine to be configured or setup, you put that configuration inside a vagrantfile. See Vagrantfile documentation
for more documentation.
Let’s say we want to start an apache2 web server project with 64bits Ubuntu precise (12.04). We might want to create a file called vagrant_ubuntu_apache and create our vagrant file inside. On my computer I will use home folder and create the vagrant folder in it.
[bash]
$ cd ~
$ mkdir vagrant_ubuntu_apache
$ touch vagrant_ubuntu_apache/Vagrantfile
[/bash]
We would like to use the 64 bits version of ubuntu server to do the installation so we will instruct vagrant through our Vagrantfile of such intentions. Make sure your Vagrantfile looks like the one below.
[ruby]
Vagrant.configure("2") do |config|
config.vm.box = "ubuntu/trusty64"
end
[/ruby]
You can you this command below to edit the Vagrantfile in your terminal
[bash]
nano vagrant_ubuntu_apache/Vagrantfile
[/bash]
To start the machine itself we need to have virtualbox started and we will have to be inside the vagrant_ubuntu_apache folder. Let’s get into that folder and start our virtual machine with the command “vagrant up”
[bash]
$ cd vagrant_ubuntu_apache
~/vagrant_ubuntu_apache$ vagrant up
Bringing machine ‘default’ up with ‘virtualbox’ provider…
==> default: Importing base box ‘ubuntu/trusty64’…
==> default: Matching MAC address for NAT networking…
==> default: Checking if box ‘ubuntu/trusty64’ is up to date…
==> default: A newer version of the box ‘ubuntu/trusty64’ is available! You currently
==> default: have version ‘14.04’. The latest is version ‘20150609.0.10’. Run
==> default: vagrant box update to update.
==> default: Setting the name of the VM: vagrant_ubuntu_apache_default_1435167016967_75821
==> default: Clearing any previously set forwarded ports…
==> default: Clearing any previously set network interfaces…
==> default: Preparing network interfaces based on configuration…
default: Adapter 1: nat
==> default: Forwarding ports…
default: 22 => 2222 (adapter 1)
==> default: Booting VM…
==> default: Waiting for machine to boot. This may take a few minutes…
default: SSH address: 127.0.0.1:2222
default: SSH username: vagrant
default: SSH auth method: private key
default: Warning: Connection timeout. Retrying…
default:
default: Vagrant insecure key detected. Vagrant will automatically replace
default: this with a newly generated keypair for better security.
default:
default: Inserting generated public key within guest…
default: Removing insecure key from the guest if its present…
default: Key inserted! Disconnecting and reconnecting using new SSH key…
==> default: Machine booted and ready!
==> default: Checking for guest additions in VM…
==> default: Mounting shared folders…
default: /vagrant => /home/joseph/vagrant_ubuntu_apache
[/bash]
As you can see our box is up swiftly and nicely. How do we then connect to our box for some work? In the output of the vagrant up command there is the output below
[plain]
==> default: Forwarding ports…
default: 22 => 2222 (adapter 1)
==> default: Booting VM…
==> default: Waiting for machine to boot. This may take a few minutes…
default: SSH address: 127.0.0.1:2222
default: SSH username: vagrant
default: SSH auth method: private key
[/plain]
What does that tell us? This means there have been some port forwarding stuff and that on the port 2222 of our own host we can access our guest on its port 22 over ssh. Explanation of port forwarding is something very difficult as I just know what it does rather than what it is. Wikipedia will surely help you gain more understanding than me. The info above also tells us that vagrant uses a private key to connect. So there are 2 ways of connecting to our vagrant box. The first is the in-built method from vagrant with the command vagrant ssh shown below.
[bash]
~/vagrant_ubuntu_apache$ vagrant ssh
Welcome to Ubuntu 12.04.5 LTS (GNU/Linux 3.2.0-86-virtual x86_64)
* Documentation: https://help.ubuntu.com/
System information as of Wed Jun 24 09:08:15 UTC 2015
System load: 0.0 Processes: 63
Usage of /: 2.6% of 39.37GB Users logged in: 0
Memory usage: 11% IP address for eth0: 10.0.2.15
Swap usage: 0%
Graph this data and manage this system at:
https://landscape.canonical.com/
Get cloud support with Ubuntu Advantage Cloud Guest:
http://www.ubuntu.com/business/services/cloud
0 packages can be updated.
0 updates are security updates.
New release ‘14.04.2 LTS’ available.
Run ‘do-release-upgrade’ to upgrade to it.
Last login: Wed Jun 24 08:52:30 2015 from 10.0.2.2
vagrant@vagrant-ubuntu-precise-64:~$
[/bash]
The second way is to use our normal ssh interface with
[text]
Username: vagrant
Password: vagrant
[/text]
[bash]
~/vagrant_ubuntu_apache$ ssh -P2222 [email protected]
The authenticity of host ‘[127.0.0.1]:2222 ([127.0.0.1]:2222)’ can’t be established.
ECDSA key fingerprint is 02:2e:eb:24:28:50:7b:e0:44:57:77:fd:51:8d:6a:d1.
Are you sure you want to continue connecting (yes/no)? yes
Warning: Permanently added ‘[127.0.0.1]:2222’ (ECDSA) to the list of known hosts.
[email protected]’s password:
Welcome to Ubuntu 14.04.2 LTS (GNU/Linux 3.13.0-48-generic x86_64)
* Documentation: https://help.ubuntu.com/
System information disabled due to load higher than 1.0
Get cloud support with Ubuntu Advantage Cloud Guest:
http://www.ubuntu.com/business/services/cloud
0 packages can be updated.
0 updates are security updates.
vagrant@vagrant-ubuntu-trusty-64:~$
[/bash]
Jay!!! We connected to our box using both ways.
Stopping a box
But wait a minute. It looks like my new guest OS is nowhere to be found in my VirtualBox panel. All indications shows that the box is live and working. This must be running in command line mode. I do have a Desktop machine so I want to see my vagrant box in my VirtualBox. So I am stopping my vagrant box:
[bash]
~/vagrant_ubuntu_apache$ vagrant halt
==> default: Attempting graceful shutdown of VM…
[/bash]
In fact I am not quite sure what it takes to get this working with the GUI so I might as well remove everything. the command below should clean every up for up for to start afresh
[bash]
~/vagrant_ubuntu_apache$ vagrant destroy
default: Are you sure you want to destroy the ‘default’ VM? [y/N] y
==> default: Destroying VM and associated drives…
[/bash]
Using Vagrant with GUI
After some research it looks like the only way to have vagrant start with GUI is to combine old vagrant configuration with the new one. Let’s edit our Vagrantfile to look like the one below
[bash]
Vagrant.configure("1") do |config|
config.vm.boot_mode = :gui
end
Vagrant.configure("2") do |config|
config.vm.box = "ubuntu/trusty64"
end
[/bash]
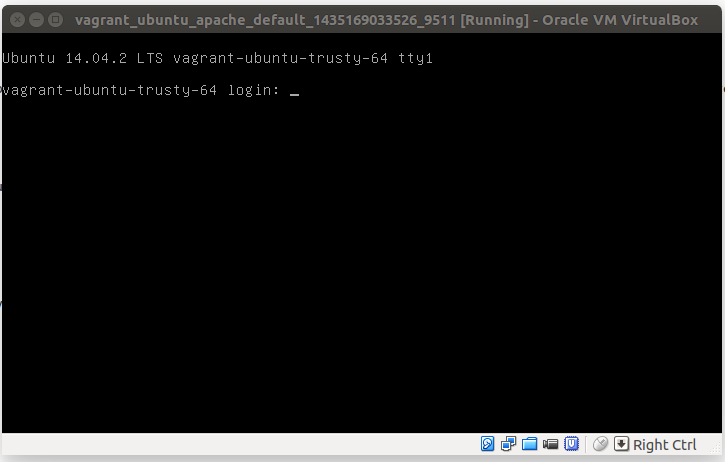
In that vagrantfile we have combine version 1 and version 2 configurations : Vagrant.configure(“1”) and Vagrant.configure(“2”) At the time of writing this seem to be the only way to get this working in GUI mode to my knowledge. If this works and I am sure it will , we should be seen a windows popping up on it own and should look like the image below
Adding an additional network adapter to VM
Not long ago I published a tutorial about how to have both NAT and still connect to the guest without the port forwarding on VirtualBox. Let’s how to achieve that with vagrant. With little research it turns out that one can actually add more configurations to the Vagrantfile to behave the way we want it. Let’s see how our Vagrantfile would look like
[bash]
Vagrant.configure("1") do |config|
config.vm.boot_mode = :gui
end
Vagrant.configure("2") do |config|
config.vm.box = "ubuntu/trusty64"
config.vm.network "private_network", ip:"192.168.56.190", :adapter =>2
end
[/bash]
This looks like just a onliner change : “config.vm.network “private_network”, ip:”192.168.56.190″, :adapter =>2″ . Assuming we have already setup our HostOnly network like said in the referenced tutorial we are basically telling vagrant to use the private_network, assign the IP : 192.168.56.190 to the box on the adapter 2. That’s it. What a shocker ;( , I have been spending time doing this manually all this while . Let’s start our box again and see whether we could connect again using 2 ways and on the static IP this time on the HostOnly network.
[bash]
~/vagrant_ubuntu_apache$ ping 192.168.56.190
PING 192.168.56.190 (192.168.56.190) 56(84) bytes of data.
64 bytes from 192.168.56.190: icmp_seq=1 ttl=64 time=0.266 ms
64 bytes from 192.168.56.190: icmp_seq=2 ttl=64 time=0.182 ms
64 bytes from 192.168.56.190: icmp_seq=3 ttl=64 time=0.195 ms
[/bash]
It looks like our box if up on the IP 192.168.56.190 let’s connect with vagrant command and via simple ssh interface.
[bash]
$ vagrant up # this worked just fine
[/bash]
[bash]
~/vagrant_ubuntu_apache$ ssh [email protected]
The authenticity of host ‘192.168.56.190 (192.168.56.190)’ can’t be established.
ECDSA key fingerprint is 36:52:9c:b3:ae:7f:55:b9:ae:4a:aa:7e:75:cd:47:26.
Are you sure you want to continue connecting (yes/no)? yes
Warning: Permanently added ‘192.168.56.190’ (ECDSA) to the list of known hosts.
[email protected]’s password:
Welcome to Ubuntu 14.04.2 LTS (GNU/Linux 3.13.0-48-generic x86_64)
* Documentation: https://help.ubuntu.com/
System information as of Wed Jun 24 18:29:13 UTC 2015
System load: 0.01 Processes: 75
Usage of /: 2.8% of 39.34GB Users logged in: 0
Memory usage: 24% IP address for eth0: 10.0.2.15
Swap usage: 0% IP address for eth1: 192.168.56.190
Graph this data and manage this system at:
https://landscape.canonical.com/
Get cloud support with Ubuntu Advantage Cloud Guest:
http://www.ubuntu.com/business/services/cloud
0 packages can be updated.
0 updates are security updates.
Last login: Wed Jun 24 18:29:13 2015 from 10.0.2.2
vagrant@vagrant-ubuntu-trusty-64:~$
[/bash]
The ssh method also worked just that this time we use the assigned IP on the regular port 22 which is omitted.
Launching multiple VMs at a go
Now that we have more knowledge on how to use vagrant we can actually do real time job on it. For example simulate an architecture made up with:
- 1 reverse proxy box
- 3 Database (mongo and mysql) boxes
- 2 application (tomcat) boxes
While this doesn’t instruct yet on how to install those component , it’s helping us setting up preliminary job by having all the boxes up and running with just one command. Maybe in another tutorial we will see how to install the servers(mongo,mysql,apache,tomcat) with configuration management tool like Ansible or Chef. To start let’s remove what we have currently with a “vagrant destroy” command and have our Vagrantfile look like below
[bash]
Vagrant.configure("1") do |config|
config.vm.boot_mode = :gui
end
Vagrant.configure("2") do |config|
auto_config= false
config.vm.define "web" do |web|
web.vm.box = "ubuntu/trusty64"
web.vm.network "private_network", ip:"192.168.56.103", :adapter =>2
end
(1..3).each do |i|
config.vm.define "mongo-#{i}" do |mongo|
mongo.vm.box = "ubuntu/trusty64"
mongo.vm.network "private_network" , ip:"192.168.56.11#{i}", :adapter =>2
end
end
(1..2).each do |i|
config.vm.define "tomcat-#{i}" do |tomcat|
tomcat.vm.box = "ubuntu/trusty64"
tomcat.vm.network "private_network" , ip:"192.168.56.12#{i}", :adapter =>2
end
end
(1..2).each do |i|
config.vm.define "mysql-#{i}" do |mysql|
mysql.vm.box = "ubuntu/trusty64"
mysql.vm.network "private_network" , ip:"192.168.56.13#{i}", :adapter =>2
end
end
end
[/bash]
Since vagrant is written in Ruby a little knowledge in Ruby can help
- (1..3) is a Range Data structure
- .each is a nicer for loop familiar with jQuery, Groovy , Python folks
- i is a variable on the the loop iterates.
I hope this helps . Voila!! Enjoy and no more monkeyfication with manual Virtualbox installation.
Nice!!