setting up spring MVC 3.2 with controllers and actions
Hello ,
This is the part4 of my series on Maven, Spring and hibernate put together. Finally we will be seeing all effort invested in this tutorial. We will proceed as followed:
- creating folder structure
- preparing web.xml for servlets and listeners
- creating mvc spring application context
- preparing production property file
- configuring production database application context
- putting the application contexts together
- creating homecontroller and showhome action
- creating home.jsp view
- running the web application
1. creating the folder structure in WEB-INF folder
We will be creating a folder structure to fit our need. those files will be needed to properly arrange files such as javascript files, css files etc. We will use the “assets” folder for js, css and images.
- Create the folder assets under WEB-INF
- Create assets children “js”,”css”,”img”
- Create the folder pages under WEB-ING
- Create it child views
- Create a simple jsp page under views called “home.jsp”
example is shown below :

2. preparing web.xml
In order to instruct the application where to send the requests to, we need set few servlets and listerner. For all the MVC framework, there is a need of a single entry point to the application commonly called the FrontController. The front controller is what knows how your application is structure and forwards the request to the appropriate handler.So the Spring DispatcherServlet is an implementation of the front controller design pattern, for more information check on oracle site
Open your web.xml file which should already be in your WEB-INF folder:
[xml]
<!–WEB-INF/web.xml–>
<?xml version="1.0" encoding="UTF-8"?>
<web-app xmlns="http://java.sun.com/xml/ns/javaee"
xmlns:xsi="http://www.w3.org/2001/XMLSchema-instance"
xsi:schemaLocation="http://java.sun.com/xml/ns/javaee http://java.sun.com/xml/ns/javaee/web-app_3_0.xsd"
version="3.0">
<session-config>
<session-timeout>
30
</session-timeout>
</session-config>
<display-name>Family Web application</display-name>
<context-param>
<param-name>webAppRootKey</param-name>
<param-value>family</param-value>
</context-param>
<!– Configuring normal spring application context file–>
<context-param>
<param-name>contextConfigLocation</param-name>
<param-value>/WEB-INF/family-web-config.xml</param-value>
</context-param>
<!– Configuring Spring front crontroller implementation which is Dispatcher–>
<servlet>
<servlet-name>family</servlet-name>
<servlet-class>org.springframework.web.servlet.DispatcherServlet</servlet-class>
<init-param>
<param-name>contextConfigLocation</param-name>
<param-value>/WEB-INF/family-web-config.xml</param-value>
</init-param>
<!–
basically there are various ways of configuring the dispatcher servlet. here I have used the main family-web-config application context
that is because there is another file web-config.xml(mainly for mvc concerns) which was included in the family-web-config. Settings in web-config.xml coudl also be directly put inside the family-web-config.xml
Supposing there isn’t any <init-param> section in the servlet tags. then our dispatcher application context would have been named family-servlet.xml because
the servlet-name is "family", so spring will take that name and append "-servlet.xml" to it assuming there will be the file family-servlet.xml will be found in the classpath.
–>
</servlet>
<!–Mapping the familly servlet to match every request–>
<servlet-mapping>
<servlet-name>family</servlet-name>
<url-pattern>/</url-pattern>
</servlet-mapping>
<listener>org.springframework.web.context.ContextLoaderListener</listener>
</web-app>
[/xml]
3. creating mvc spring application context
Now that we have the web.xml hooked up with some files which we actually need to create.
[xml]
<!–/WEB-INF/web-config.xml–>
<?xml version="1.0" encoding="UTF-8"?>
<beans xmlns="http://www.springframework.org/schema/beans"
xmlns:xsi="http://www.w3.org/2001/XMLSchema-instance"
xmlns:c="http://www.springframework.org/schema/c"
xmlns:context="http://www.springframework.org/schema/context"
xmlns:p="http://www.springframework.org/schema/p"
xmlns:util="http://www.springframework.org/schema/util"
xmlns:mvc="http://www.springframework.org/schema/mvc"
xsi:schemaLocation="http://www.springframework.org/schema/beans http://www.springframework.org/schema/beans/spring-beans-3.2.xsd
http://www.springframework.org/schema/context http://www.springframework.org/schema/context/spring-context-3.2.xsd
http://www.springframework.org/schema/util http://www.springframework.org/schema/util/spring-util-3.2.xsd
http://www.springframework.org/schema/mvc http://www.springframework.org/schema/mvc/spring-mvc-3.2.xsd">
<!–This mvc annotation-driven guy is specific to spring 3.+. He is the guy that understand all the new
features of spring 3 , @Valid annotation, @RequestMapping some DataTypes and Json conversion annotations.
basically it tells this application context that we will use annotations for our MVC stuff–>
<mvc:annotation-driven/>
<!– this guys is the one that knows that when we put @Controller annotation on top of a class we meant
that the class should be treated as Mr Controller. Basically he goes for scanning looking for any kind
of annotation in the specified package –>
<context:component-scan base-package="net.djomeda.tutorials.springdatamvcfamily.controller"/>
<!–
This part is the one that help us have cute urls. tricking everybody to think that we are not using jsp per se.
This is a way to configure jsp pages such a way that spring knows where the views are. That allows us to name the
desired view just by mentioning just the name of the file ignoring its path and its extention. That file name will be
prepended with this preffix and appended with the suffix –>
<bean class="org.springframework.web.servlet.view.InternalResourceViewResolver">
<property name="prefix" value="/WEB-INF/pages/views/" />
<property name="suffix" value=".jsp" />
</bean>
<!–
This resource is the way spring handles static files in the MVC framework. so if there
an image in WEB-INF/assets/img/logo.png on any page we have to access it using spring tag
library functionality : <spring:url value=’/images/logo.png’/>
–>
<mvc:resources mapping="/images/**" location="/assets/img/" />
<mvc:resources mapping="/styles/**" location="/assets/css/" />
<mvc:resources mapping="/javascript/**" location="/assets/js/" />
</beans>
[/xml]
4. preparing production property file
In part 2 of this series we have created a file called family.properties but nothing in particular has been done to it. Now is the time for configuring it. Let’s locate the src/main/resource/family.properties file and make it look like the snippet below.
[text]
//src/main/resource/family.properties
#MySQL JDBC Props
jdbc.driverClassName=com.mysql.jdbc.Driver
jdbc.username=shizune
jdbc.password=tonton
jdbc.url=jdbc:mysql://localhost:3306/family
#MySQL Hibernate Props
hibernate.dialect=org.hibernate.dialect.MySQLDialect
hibernate.show_sql=true
hibernate.format_sql=true
hibernate.hbm2ddl.auto=create
##H2 JDBC Props
#jdbc.driverClassName=org.h2.Driver
#jdbc.username=sa
#jdbc.password=
#jdbc.url=jdbc:h2:file:target/family
##H2 Hibernate Props
#hibernate.dialect=org.hibernate.dialect.MySQLDialect
#hibernate.show_sql=true
#hibernate.format_sql=true
#hibernate.hbm2ddl.auto=create
[/text]
the section commented out is for when someone is willing to switch to H2 embedded database.
5. configuring production database application context
In part 3 of this series we have set up testing-db-config.xml but not the actual db-config.xml that will be used in production. This file is much closer to test-db-config.xml just that it will use a different thus a production properties file which is family.properties. Let’s create db-config.xml to look exactly like the snippet below:
EDIT : It has been drawn to my attention that I have left few entry out in the db-config.xml
[xml]
<!–WEB-INF/db-config.xml–>
<?xml version="1.0" encoding="UTF-8"?>
<beans xmlns="http://www.springframework.org/schema/beans"
xmlns:xsi="http://www.w3.org/2001/XMLSchema-instance"
xmlns:jee="http://www.springframework.org/schema/jee"
xmlns:lang="http://www.springframework.org/schema/lang"
xmlns:util="http://www.springframework.org/schema/util"
xmlns:p="http://www.springframework.org/schema/p"
xmlns:context="http://www.springframework.org/schema/context"
xmlns:jpa="http://www.springframework.org/schema/data/jpa"
xsi:schemaLocation="http://www.springframework.org/schema/beans
http://www.springframework.org/schema/beans/spring-beans-3.1.xsd
http://www.springframework.org/schema/jee
http://www.springframework.org/schema/jee/spring-jee-3.1.xsd
http://www.springframework.org/schema/lang
http://www.springframework.org/schema/lang/spring-lang-3.1.xsd
http://www.springframework.org/schema/util
http://www.springframework.org/schema/util/spring-util-3.1.xsd
http://www.springframework.org/schema/context
http://www.springframework.org/schema/context/spring-context-3.1.xsd
http://www.springframework.org/schema/data/jpa
http://www.springframework.org/schema/data/jpa/spring-jpa.xsd">
<bean id="dataSource" class="org.springframework.jdbc.datasource.DriverManagerDataSource">
<property name="driverClassName" value="${jdbc.driverClassName}" />
<property name="url" value="${jdbc.url}" />
<property name="username" value="${jdbc.username}"/>
<property name="password" value="${jdbc.password}" />
</bean>
<bean id="entityManagerFactory" class="org.springframework.orm.jpa.LocalContainerEntityManagerFactoryBean">
<property name="dataSource" ref="dataSource" />
<property name="packagesToScan" value="net.djomeda.tutorials.springdatamvcfamily.model"/>
<property name="persistenceUnitName" value="family" />
<property name="jpaProperties">
<props>
<prop key="hibernate.dialect">${hibernate.dialect}</prop>
<prop key="hibernate.show_sql">${hibernate.show_sql}</prop>
<prop key="hibernate.format_sql">${hibernate.format_sql}</prop>
<prop key="hibernate.hbm2ddl.auto">${hibernate.hbm2ddl.auto}</prop>
</props>
</property>
</bean>
<!–Beginning of the update–>
<bean id="transactionManager" class="org.springframework.orm.jpa.JpaTransactionManager">
<property name="entityManagerFactory" ref="entityManagerFactory"/>
</bean>
<!–End of the update–>
<bean id="jpdDialect" class="org.springframework.orm.jpa.vendor.HibernateJpaDialect"/>
<jpa:repositories base-package="net.djomeda.tutorials.springdatamvcfamily.repository"/>
</beans>
[/xml]
6. putting the application contexts together
The astute reader would have noticed that there is a family-web-config.xml somewhere in the web.xml but then , there is no mention of it in this part of the tutorial. Also there isn’t the family.properties in db-config.xml. Truth is we have split our configuration into logical units for us to make sense out of it or to make it more manageable. So we have db-config.xml and web-config.xml which handle database and MVC concerns respectively. In order to make web-config.xml available to the web.xml, we need then instruct the main family-web-config.xml about how to where to locate those files. By using the import feature of the application context, we will make all needed application contexts look like one big application context which will contain the actual production properties file which is family.properties.
[xml]
<!–WEB-INF/family-web-config.xml–>
<?xml version="1.0" encoding="UTF-8"?>
<beans xmlns="http://www.springframework.org/schema/beans"
xmlns:xsi="http://www.w3.org/2001/XMLSchema-instance"
xmlns:jee="http://www.springframework.org/schema/jee"
xmlns:lang="http://www.springframework.org/schema/lang"
xmlns:util="http://www.springframework.org/schema/util"
xmlns:p="http://www.springframework.org/schema/p"
xmlns:context="http://www.springframework.org/schema/context"
xmlns:tx="http://www.springframework.org/schema/tx"
xsi:schemaLocation="http://www.springframework.org/schema/beans
http://www.springframework.org/schema/beans/spring-beans-3.1.xsd
http://www.springframework.org/schema/jee
http://www.springframework.org/schema/jee/spring-jee-3.1.xsd
http://www.springframework.org/schema/lang
http://www.springframework.org/schema/lang/spring-lang-3.1.xsd
http://www.springframework.org/schema/util
http://www.springframework.org/schema/util/spring-util-3.1.xsd
http://www.springframework.org/schema/context
http://www.springframework.org/schema/context/spring-context-3.1.xsd
http://www.springframework.org/schema/tx
http://www.springframework.org/schema/tx/spring-tx-3.1.xsd
">
<!–Loading production properties file–>
<bean id="propertyConfigurer"
class="org.springframework.beans.factory.config.PropertyPlaceholderConfigurer">
<property name="locations">
<list>
<value>classpath:family.properties</value>
</list>
</property>
</bean>
<context:annotation-config />
<tx:annotation-driven />
<context:component-scan base-package="net.djomeda.tutorials.springdatamvcfamily" />
<!–Importing db-config.xml into family-web-config.xml–>
<import resource="db-config.xml" />
<!–Importing web-config.xml into family-web-config.xml–>
<import resource="web-config.xml" />
</beans>
[/xml]
7. creating homecontroller and showhome action
Time to create the HomeController. That controller is what we want to handle urls like default ones, or “/home”. Let’s create the HomeController in the controller package. It should look like the following.
[java]
package net.djomeda.tutorials.springdatamvcfamily.controller;
import org.springframework.stereotype.Controller;
import org.springframework.ui.Model;
import org.springframework.web.bind.annotation.RequestMapping;
/**
*
* @author joseph
*/
@Controller
public class HomeController {
@RequestMapping(value="/")
public String showHome(Model model){
return "home";
}
/*
* Model is not necessary at this stage .It’s used to send data to the view. This method is similar to the
* previous one. but this time it’s to show that a single action can handle multiple urls.
*/
@RequestMapping(value = {"/home","/welcome"})
public String showOtherHomeUrl(Model model){
return "home";
}
}
[/java]
8. creating home.jsp view
First of all in order to make sure our MVC works, let’s delete the index.jsp from WEB-INF that was auto generated by Netbeans (and other IDEs). In the web-config.xml we said our views should be found at : /WEB-INF/pages/views/. In our showHome action of the HomeController we returned the string “home” which should be the name of the view with “.jsp” suffix.
[html]
<!–/WEB-INF/pages/views/home.jsp–>
<%@page contentType="text/html" pageEncoding="UTF-8"%>
<!DOCTYPE html>
<html>
<head>
<meta http-equiv="Content-Type" content="text/html; charset=UTF-8">
<title>Spring Data Family:: Welcome to the index page</title>
</head>
<body>
<h1>Congratulations!!!</h1><br/>
<h5>your long awaited home page(view in this case) is now hooked up by spring Controller</h5>
</body>
</html>
[/html]
9. running the web application
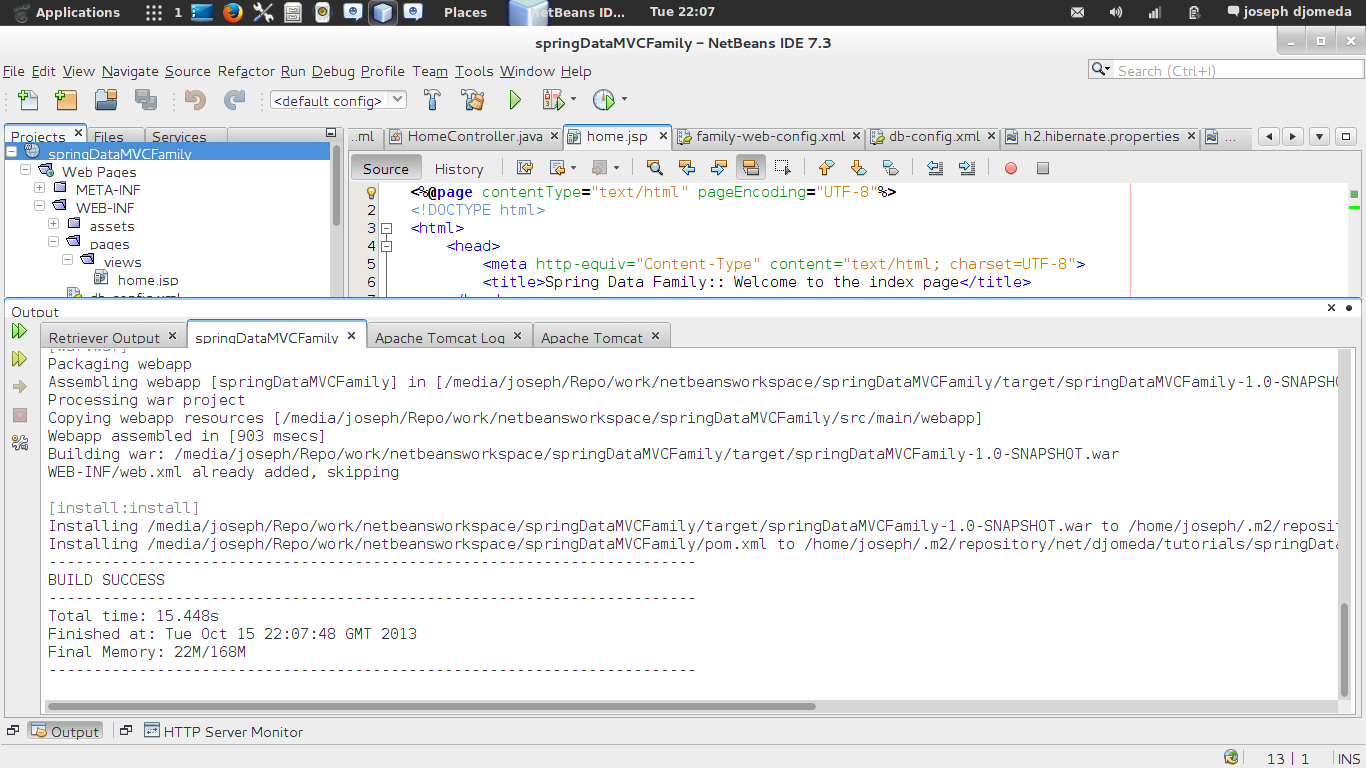
In order to run our web app, let’s compile it. check below how to :
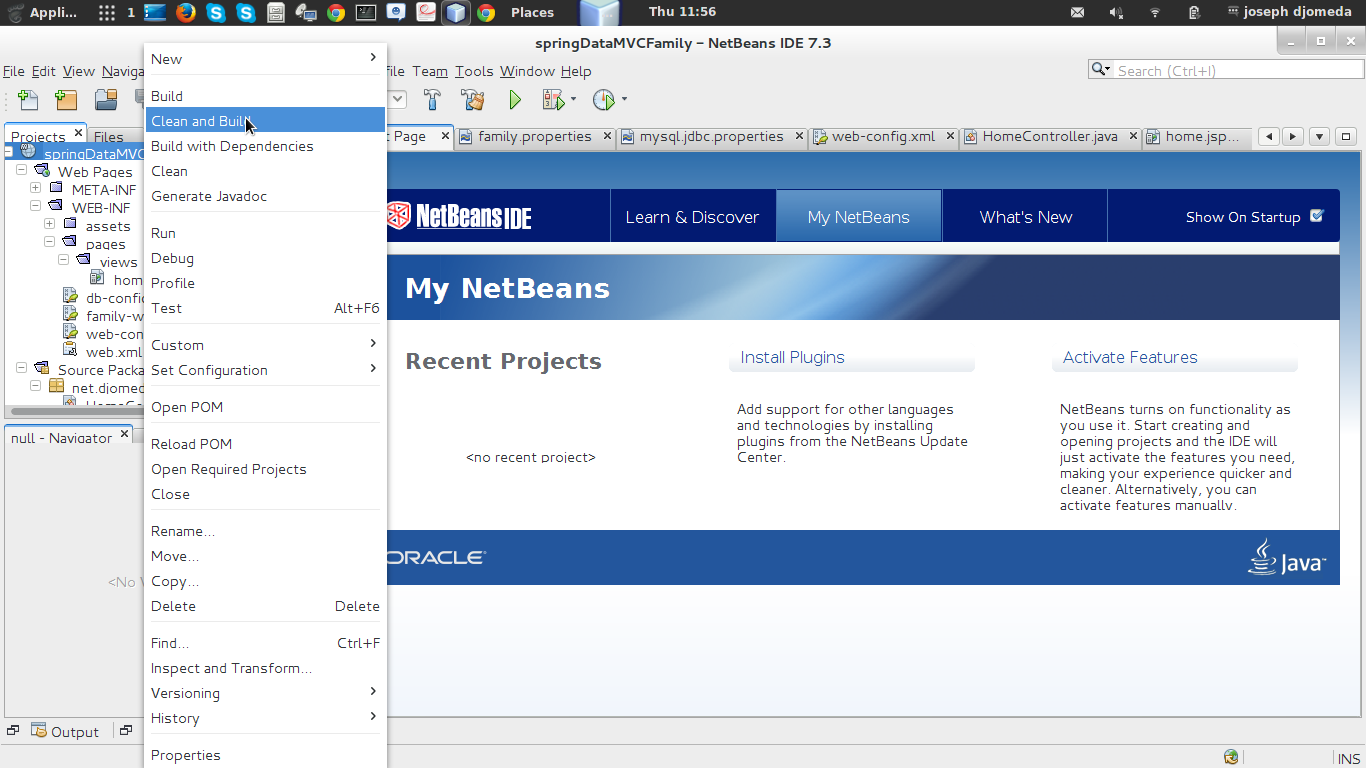
When it totally compiles it should look similar to the following screen:
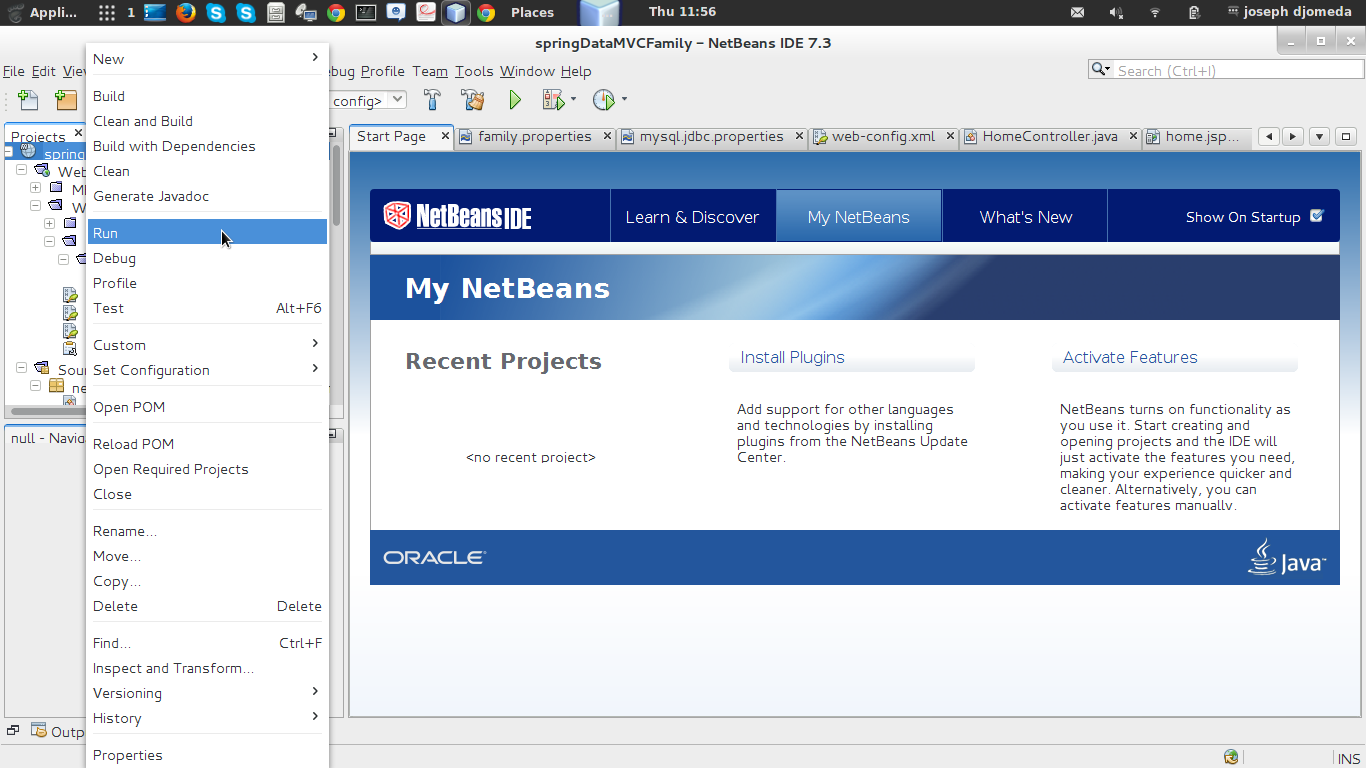
Now let’s run our application:
It should look like the image below: the url is “/” which is the default one
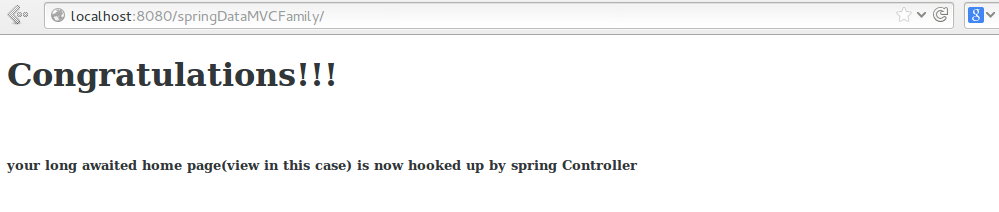
let’s type “http://localhost:8080/springDataMVCFamily/home” in the address bar.
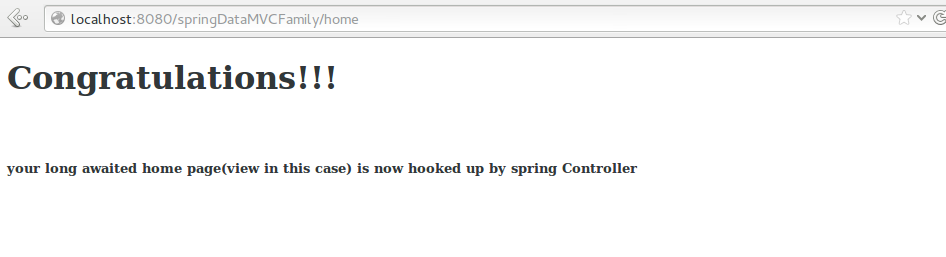
As you can see it presents the same page and that is due to this following part of
[java]
@RequestMapping(value = {"/home","/welcome"})
public String showOtherHomeUrl(Model model){
return "home";
}
[/java]
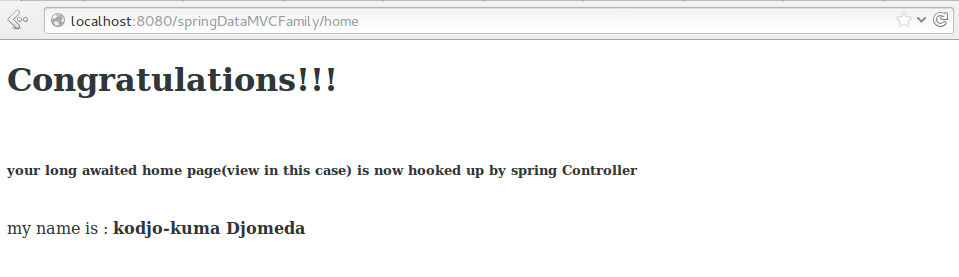
Now let’s pass some variable to the front end (the view as in home page). In order to do that let’s modify an action
[java]
//HomeController.java
@RequestMapping(value = {"/home","/welcome"})
public String showOtherHomeUrl(Model model){
model.addAttribute("name", "kodjo-kuma Djomeda");
return "home";
}
[/java]
the Model is used to pass data to the front end. In the front end we will access the data using the name of the variable: “name”.
let’s also make provision for the front end to print our variable.
[xml]
<!–WEB-INF/pages/views/home.jsp–>
<h1>Congratulations!!!</h1><br/>
<h5>your long awaited home page(view in this case) is now hooked up by spring Controller</h5>
<br/> my name is : <strong>${name}</strong>
[/xml]
when run it should look like below:
That’s it.
honestly I wanted to talk a lot more about this with different cases but as you can see this post is very long. I had to break this on down again in chunks. I will be talking next time about how to make use of the database layer that we set up using spring-data jpa.
When trying to run the app, I got the following message in the server log:
java.lang.RuntimeException: The persistence-context-ref-name [org.springframework.data.jpa.repository.support.JpaRepositoryFactoryBean/entityManager] in module [spring-mvc-hib] resolves to a persistence unit called [family] which is of type RESOURCE_LOCAL. Only persistence units with transaction type JTA can be used as a container managed entity manager. Please verify your application.
As a result the app could not be installed.
That’s quite unfortunate. which server are you using? tomcat? tomee, glassfish?
Men what a great work Kodjo, really appreciate. The best Maven tutorial I have come accross on the internet. I know you are blessed and if you need support in any form please let me know.
Thank you Andy, That’s kind of you. Your acknowledgment alone is support for me. You can share the link with people you know would need it. You can also submit a request for a particular tutorial. If I am knowledgeable enough to write about it. I will publish it ^_^. thanks again
HTTP Status 500 – Servlet.init() for servlet family threw exception
I got this error when trying to run the application after creating the home controller and the home.jsp view. I’ve tried lots of suggestions online but the problem still persists. Please help
Yaadar, sorry for this. Can you please share your code on github for me to have a look? Cheers