Getting Started with Ansible Works (AWX)
Hi readers, if you got here, it means you know a little bit about Ansible core. I suspect you also know about the community version of its enterprise offer Ansible Tower, called Ansible Works(AWX). Today, I will show you how I got it installed.
I personally have gotten to the point where I need to delegate work concerning configuration management and making sure that by doing so I don’t shoot myself in the foot. I believe Ansible Works AWX helps put necessary controls for any sysadmin or automation engineer to open up for help from team members.
Considering Ansible Works AWX will be your configuration management GUI, you might want to agree with your team on how you expose this over the net. It’s just an understatement saying it could be dangerous. You can use firewall to lock the port to your office public IP, or use a client certifiate system, or install in a private network and access via ssh tunnelling or via VPN.
Without further ado, let’s get into the essence of this post. One article that greatly inspired me is how to install Ansible Works AWX from howtoforge . I will be using AWS as a cloud provider on the following:
- Server: Ubuntu bionic (EC2 t2.medium)
- Database: PostgreSQL (RDS db.t2.small )
Below will be what we will be doing:
- Create an EC2 instance
- Install git
- Install pyenv
- Install python 3 with pyenv
- Install Ansible Core
- Install Docker
- Install nvm, nodejs, npm
- Install Nginx
- Install PostgreSQL client
- Create an RDS Postgre instance
- Configure the Postgre for use by AWX
- Download AWX source from git and configure
- Prepare for some customization if any
- Modify AWX ansible template or task to take into account the customization
- Install Ansible Works AWX
- Configure Nginx
Creating an EC2 Instance
There are so many articles all over the net about that I think it’s ok for those not too familiar with it to go read on. You can refer to this one from guru99 for example.
Installing git
In case your Ubuntu distribution doesn’t come with git preinstalled you can use the command below to get it done
$ apt install gitInstalling pyenv
It has become a habit for me not to tie a specific version of anything, be it python, node, or java to my machine. With experience, using a form of version manager seems to provide a little more freedom on configuration. So for python, we will use pyenv
If you follow the instruction on their GitHub page and execute the pyenv doctor code you should have the output below:
$ pyenv doctor
Cloning /root/.pyenv/plugins/pyenv-doctor/bin/.....
Installing python-pyenv-doctor...
Installed python-pyenv-doctor to /tmp/pyenv-doctor.20200214154056.14834/prefix

Congratulations! You are ready to build pythons!
In case you face any error about: “not acceptable C compiler found”, you could install the following packages and run the pyenv doctor again.
$ apt-get install -y make build-essential libssl-dev zlib1g-dev libbz2-dev libreadline-dev libsqlite3-dev wget curl llvm libncurses5-dev libncursesw5-dev xz-utils tk-dev libffi-dev liblzma-dev python-openssl
Installing Python 3 with pyenv
At the time of writing python 3.8.1 is available so we will use that one.
$ pyenv  install 3.8.1
Downloading Python-3.8.1.tar.xz...
-> https://www.python.org/ftp/python/3.8.1/Python-3.8.1.tar.xz
Installing Python-3.8.1...
Installed Python-3.8.1 to /root/.pyenv/versions/3.8.1
Once that’s done we can set up the system to use the pyenv python instead of the stock version.
$ python --version
Python 2.7.17
$ pyenv global 3.8.1
$ python --version
Python 3.8.1
Installing Ansible Core
I prefer installing python from pip as it allows me to move to a different ansible version from a different version of python.
$ pip install ansible
$ pip freeze | grep ansible
ansible==2.9.5
Installing Docker
We will install docker driver via pip as well
$ apt install docker.io
$ pip install docker-compose
Installing nvm,nodejs,npm
Faithful to our principle, we will install nvm in order to install nodejs and npm. We can use the instruction from the nvm github page.
$ curl -o- https://raw.githubusercontent.com/nvm-sh/nvm/v0.35.2/install.sh | bash
$ exec $SHELL
$ nvm install node
Downloading and installing node v13.8.0...
Creating default alias: default -> node (-> v13.8.0)
$ npm --version
6.13.6
$ npm install npm --global
Installing Nginx
We will use Nginx as a reverse proxy in order to put either an SSL certificate in front of the AWX or have other constraints like requesting for client certificate etc. The purpose for me using Nginx is to use SSL and only open port 443 locked to my office public IPs
$ add-apt-repository ppa:nginx/stable
$ apt-get update
$ apt-get install -y nginx
$ nginx -v
nginx version: nginx/1.16.1
Installing Postgres client
We need to install a client on our EC2 instance in order to create a database and a user to use. From our check on RDS, we will be using PostgreSQL 11 so it makes sense to install a compatible client, thus postgresql-client-11.
$ wget --quiet -O - https://www.postgresql.org/media/keys/ACCC4CF8.asc | sudo apt-key add -
$ RELEASE=$(lsb_release -cs)
$ echo $RELEASE
bionic
$ echo "deb http://apt.postgresql.org/pub/repos/apt/ ${RELEASE}"-pgdg main | sudo tee  /etc/apt/sources.list.d/pgdg.list
$ cat /etc/apt/sources.list.d/pgdg.list
$ apt update
$ apt -y install postgresql-client-11
$ psql --version
psql (PostgreSQL) 11.7 (Ubuntu 11.7-1.pgdg18.04+1)
Creating RDS PostgreSQL instance
Here as well, I will refer you to an online tutorial. I will be using
- Postgre version 11
- AZ mode
- DB name: awx_db
I found this article from towardsdatascience site. It explains the creation process step by step. Though you can stop at the point where connection is made to the DB via psycopg2 library as I will not use that. But feel free to follow that if that works for you.
Configuring the Postgres instance
During this step, we will create a DB user for the AWX app with the necessary privileges. Do not forget to allow the EC2 security group inside the Postgres security for the port 5432 or the post you have chosen for your rds instance.
let’s connect to the rds instance from the ec2 terminal:
$ psql --host=ansibleawx.xxxxxxxx.us-east-1.rds.amazonaws.com --port=5432 --username=mypsqlroot --password --dbname=awx_db
Password:
awx_db=> create role awx_p_user with password 'useyourownpasshere' login;
CREATE ROLE
awx_db=> grant all privileges on database awx_db to awx_p_user;
GRANT
awx_db=> \q
$ psql --host=ansibleawx.xxxxxxx.us-east-1.rds.amazonaws.com --port=5432 --username=awx_p_user --password --dbname=awx_db
psql (11.7 (Ubuntu 11.7-1.pgdg18.04+1), server 11.5)
SSL connection (protocol: TLSv1.2, cipher: ECDHE-RSA-AES256-GCM-SHA384, bits: 256, compression: off)
Type "help" for help.
awx_db=> \q
Downloading AWX from git
We will create a directory at /opt/awx to hold the git files of AWX, then git clone it inside.
mkdir /opt/awx
cd /opt/awx
git clone https://github.com/ansible/awx.git .
The installer folder holds a set of files with this current version at the time of writing this blog post.
#inside /opt/awx/installer
build.yml
install.yml
inventory
roles\
-- check_vars\
-- image_build\
-- image_push\
-- kurbenetes\
-- local_docker\
Preparing for customization
Indeed, I have a number of customization I would like to explain here
- My git repository where all the ansible core playbooks and roles are, is configured to request a client certificate challenge before granting access. Thus any app or person should configure that client and key certificates before usage.
- Each project uses a different ssh key for configuration purposes, limiting a key compromise if any, to specific projects as opposed to everything. I need to mount those files so AWX gets them using environment variables
Now back to my local machine, I will need to copy the cert and key files to the EC2.
#On my local machine this time
scp -i /path/to/my/sshkey/JosephIdentity.pem  /path/to/git/client/creds/mygit.com_client.* [email protected]:/home/ubuntu
mygit.com_client.crt                                                                                                                    100% 1716     8.3KB/s   00:00
mygit.com_client.key                                                                                                                    100% 1704     8.3KB/s   00:00
We will use one big folder to keep all the customization files. We will create an AWX_CONFIG as a base directory where we will keep the gitconfig. HOME folder for a directory, I refer to inside my playbook as home and GITKEYS where we will keep the .crt and .key files for my git access.
Now let’s got back to the EC2 to continue the configuration of the customization
# in EC2
$ mkdir -p /opt/AWX_CONFIG/{HOME,GITKEYS}
$ cd /opt/AWX_CONFIG/GITKEYS
$ mv /home/ubuntu/mygit.com_client.* .
$ cd ../..
$ pwd
/opt/
$ nano gitconfig
In nano editor, if you need this customization, make sure it looks like the following.
#inside /opt/gitconfig
 [http "https://mygit.com"]
        sslCert = /opt/AWX_CONFIG/GITKEYS/mygit.com_client.crt
        sslKey = /opt/AWX_CONFIG/GITKEYS/mygit.com_client.key
[http “https://mygit.com”] this limits the client ssl configuration to only the git with domain name mygit.com. If you don’t have that restriction, the client ssl configuration will apply to all git including github, gitlab.com and your call will fail.
Modifying AWX installer files for customization
Inventory file configuration
Before editing the inventory file, you need to have generated a random “password” to be used as secret_key in AWX.
I already have pwgen a nice utility tool on my local machine, so I will use that.
#On my local machine, generating 50 characters
$  pwgen -s -1 -B 50
# if you don't have pwgen you could use openssl
$ openssl rand -hex 32
The inventory file is in /opt/awx/installer
$ cd /opt/awx/installerLet’s edit the inventory file now. Change the following
- host_port from 80 to 8080
- host_port_ssl from 443 to 8443
- uncomment pg_hostname and replace it with your rds Postgres URL
- change the pg_username value to awx_p
- change the pg_password value to the one you created for awx_p
- change the pg_port if you a different one
- change the rabbitmq_password value
- change the rabbitmq_erlang_cookie value as well
- change the admin_user value to the one you wish to use to login to AWX via its web GUI
- change the admin_password to the one you can remember
- use the random key we created for the secret_key
$ nano inventory
host_port=8080
host_port_ssl=8443
pg_hostname=ansibleawx.xxxxxxxxxxx.us-east-1.rds.amazonaws.com
pg_username=awx_p
pg_password=yourpgpassword
pg_database=ansibleworks_db
pg_port=5432
rabbitmq_password=awxsomething
rabbitmq_erlang_cookie=c00kiemonst3r
secret_key=LnVEwHnAgJxocNhyUXzt9fn4k4hfFAKkKhp7Pu9puq3K74HtUw
Editing the template file to include changes
From the installer folder lets’ look for the ansible template file: roles/local_docker/templates/docker-compose.yml.j2
Inside that file look for the section task: and edit the volumes: and environment: section
$ nano roles/local_docker_templates/docker-compose.yml.j2
    restart: unless-stopped
    volumes:
      - "/opt/AWX_CONFIG/:/opt/AWX_CONFIG:rw" # this is us
      - "/opt/gitconfig:/etc/gitconfig" # this one too
      - "{{ docker_compose_dir }}/SECRET_KEY:/etc/tower/SECRET_KEY"
      .........
    {% endif %}
    environment:
      DO_ANSIBLE_HOME: /opt/AWX_CONFIG/HOME # This is us
      http_proxy: {{ http_proxy | default('') }}
      ..........
Installing AWX
From the /opt/awx/installer folder, let run the following
$ ansible-playbook -i inventory install.yml
.....
.....
# the output would be similar to this
TASK [local_docker : Create Docker Compose Configuration] *********************************************************************************************************************************************************
changed: [localhost] => (item=environment.sh)
changed: [localhost] => (item=credentials.py)
changed: [localhost] => (item=docker-compose.yml)
changed: [localhost] => (item=nginx.conf)

TASK [local_docker : Render SECRET_KEY file] **********************************************************************************************************************************************************************
changed: [localhost]

TASK [local_docker : Start the containers] ************************************************************************************************************************************************************************
changed: [localhost]

TASK [local_docker : Update CA trust in awx_web container] ********************************************************************************************************************************************************
changed: [localhost]

TASK [local_docker : Update CA trust in awx_task container] *******************************************************************************************************************************************************
changed: [localhost]
Let’s verify our setup after some time of the ansible-playbook execution
$ docker container ps -a
CONTAINER ID IMAGE COMMAND CREATED STATUS PORTS NAMES
7f9f040fcadd ansible/awx_task:9.2.0 "/tini -- /bin/sh -c…" 9 minutes ago Up 9 minutes 8052/tcp awx_task
a6b3395dc797 ansible/awx_web:9.2.0 "/tini -- /bin/sh -c…" 9 minutes ago Up 9 minutes 0.0.0.0:8080->8052/tcp awx_web
d6f9f671a291 ansible/awx_rabbitmq:3.7.4 "docker-entrypoint.s…" 9 minutes ago Up 9 minutes 4369/tcp, 5671-5672/tcp, 15671-15672/tcp, 25672/tcp awx_rabbitmq
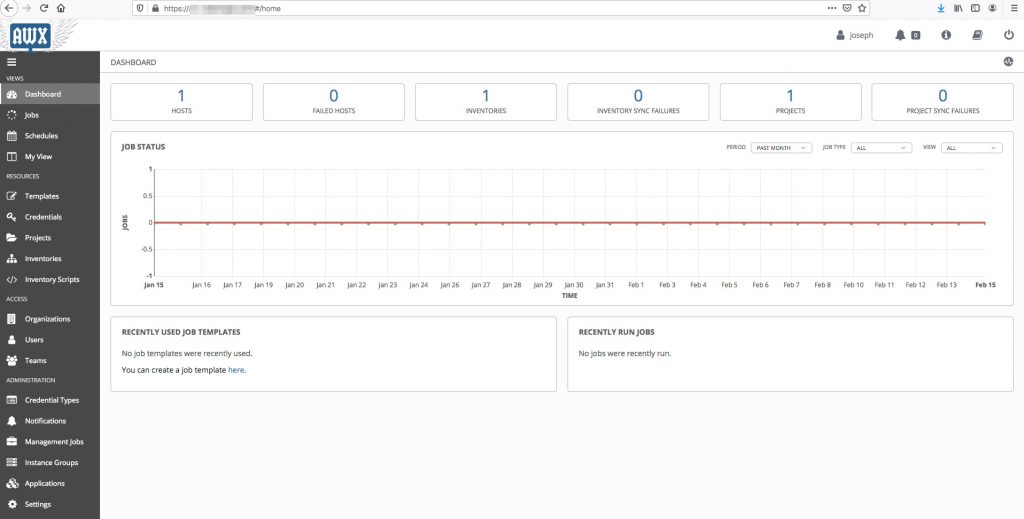
0947f859813d memcached:alpine "docker-entrypoint.s…" 9 minutes ago Up 9 minutes 11211/tcp awx_memcachedThis means if you open your security group on port 8080 you should be able to hit the UI of AWX on http://yourEIP:8080
Configuring Nginx
Once again the purpose of Nginx here for me is to have a reverse proxy handling all the SSL concerns etc. So I will be configuring Nginx accordingly. I will be using a purchased SSL certificate. feel free to use a letsencrypt certificate.
Open /etc/nginx/nginx.conf and add the following block
$ nano /etc/nginx/nginx.conf # uncomment server_token section and add the rest below
    server_tokens off;
    add_header X-Frame-Options SAMEORIGIN;
    add_header X-Content-Type-Options nosniff;
    add_header X-XSS-Protection "1; mode=block";
open /etc/nginx/sites-available/ssl_awx.mydomain.com.conf and add the following block to it
$ nano /etc/nginx/sites-available/ssl_zwx.mydomain.com.conf
    server {

        listen  443 ssl;
        server_name    awx.mydomain.com;

        ssl_certificate     /srv/ssl/doersops.com/awx.mydomain.com_bundle.crt;
        ssl_certificate_key /srv/ssl/doersops.com/awx.mydomain.com.key;
        ssl_prefer_server_ciphers on;
        ssl_session_timeout 20m;
        ssl_session_cache shared:MySSL:10m;
        ssl_session_tickets off;
        ssl_protocols TLSv1.2 TLSv1.3;
        ssl_ciphers  ECDHE-ECDSA-AES128-GCM-SHA256:ECDHE-RSA-AES128-GCM-SHA256:ECDHE-ECDSA-AES256-GCM-SHA384:ECDHE-RSA-AES256-GCM-SHA384:ECDHE-ECDSA-CHACHA20-POLY1305:ECDHE-RSA-CHACHA20-POLY1305:DHE-RSA-AES128-GCM-SHA256:DHE-RSA-AES256-GCM-SHA384;

        access_log /var/log/nginx/ssl_awx.mydomain.com_access.log;
        error_log  /var/log/nginx/ssl_awx.mydomain.com_error.log warn;


        location / {
            proxy_http_version 1.1;
            proxy_set_header Host $host;
            proxy_set_header X-Real-IP $remote_addr;
            proxy_set_header X-Forwarded-For $proxy_add_x_forwarded_for;
            proxy_set_header X-Forwarded-Proto $scheme;
            proxy_set_header Upgrade $http_upgrade;
            proxy_set_header Connection "upgrade";
            proxy_pass http://localhost:8080/;
        }
    }
After saving the configuration you need to enabled it
$ cd /etc/nginx/sites-enabled/
$ ln -s /etc/nginx/sites-available/ssl_awx.mydomain.com.conf
$ nginx -t
nginx: the configuration file /etc/nginx/nginx.conf syntax is ok
nginx: configuration file /etc/nginx/nginx.conf test is successful
$ service nginx restart
After that, you can login at your domain https://awx.mydomain.com